
Workflow Trigger Setup
Summary
Workflow Triggers define where workflow messages come from, and how messages will be supplied to the workflow for processing.
The video above demonstrates how to configure a Workflow Trigger.
Step 1: Open the Workflow Trigger page
To open a Visual Data Map:
-
Open the Project Environment that contains the workflow, using the left-hand menu or dashboard.
-
Open the desired workflow.
-
Open the Workflow Trigger page (marker 1 below).
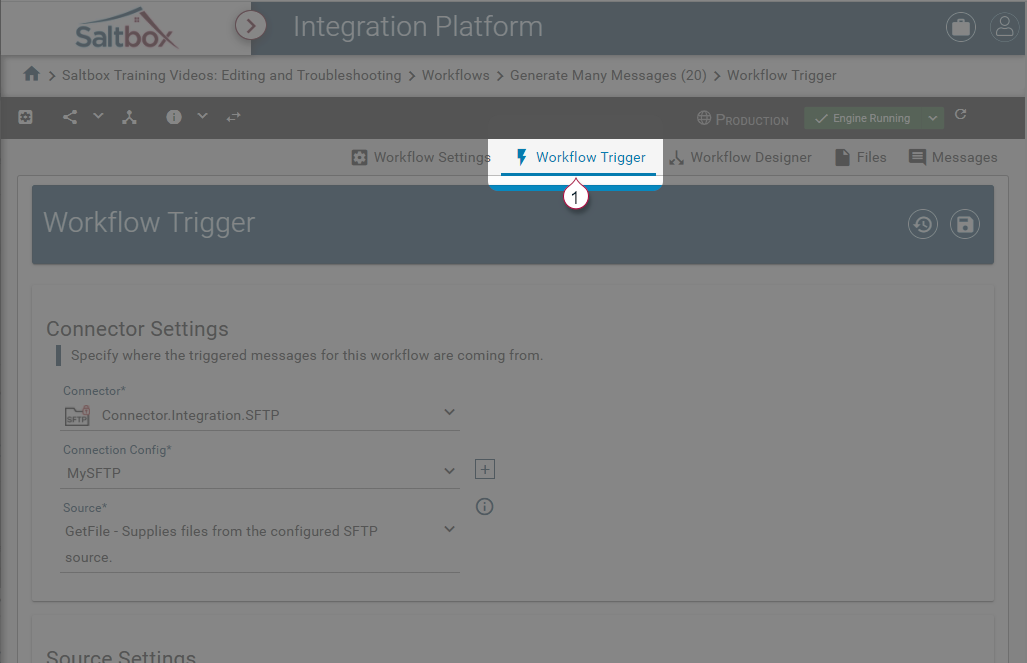
Step 2: Select the Connector and Source

In the Connector Settings section, select the desired Connector (marker 2 above).
After selecting a Connector, related Connection Config entries will be displayed. Select a Connection Config (marker 3 above), or add a new one using the + button. This will determine which system will be accessed.
Finally, choose a Source (marker 4 above). This determines what type of data is retrieved from the system. Advanced options related to this data will be displayed in the Source Settings section.
Step 3: Configure Source Settings
Source Settings vary between Connectors, or between sources within a connector. To aid in configuring a setting, option hints and examples are listed on the right-hand side of the page. Hover over the info icon to see more details for each option.
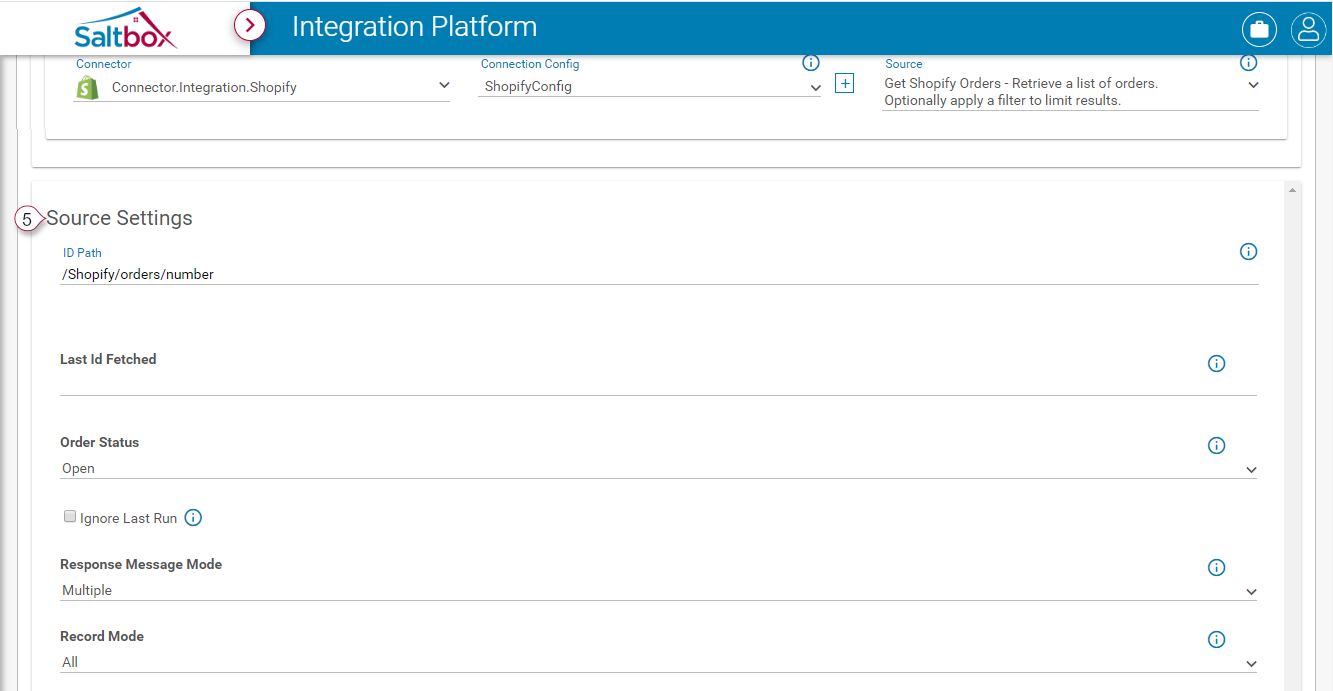
A friendly ID can be pulled from the trigger message based on the ID Path field. Fill in the ID Path (XPath to the friendly ID) or use the Visual Data Mapper to pick the ID Path from a mapped source.
To assign the ID Path using Visual Data Mapper:
- Open Workflow Designer.
- Open a visual data map for the first mapped action.
- Find the data element to be used as a friendly ID for the trigger.
- Open the options menu for the desired data element and “Set as Message ID”
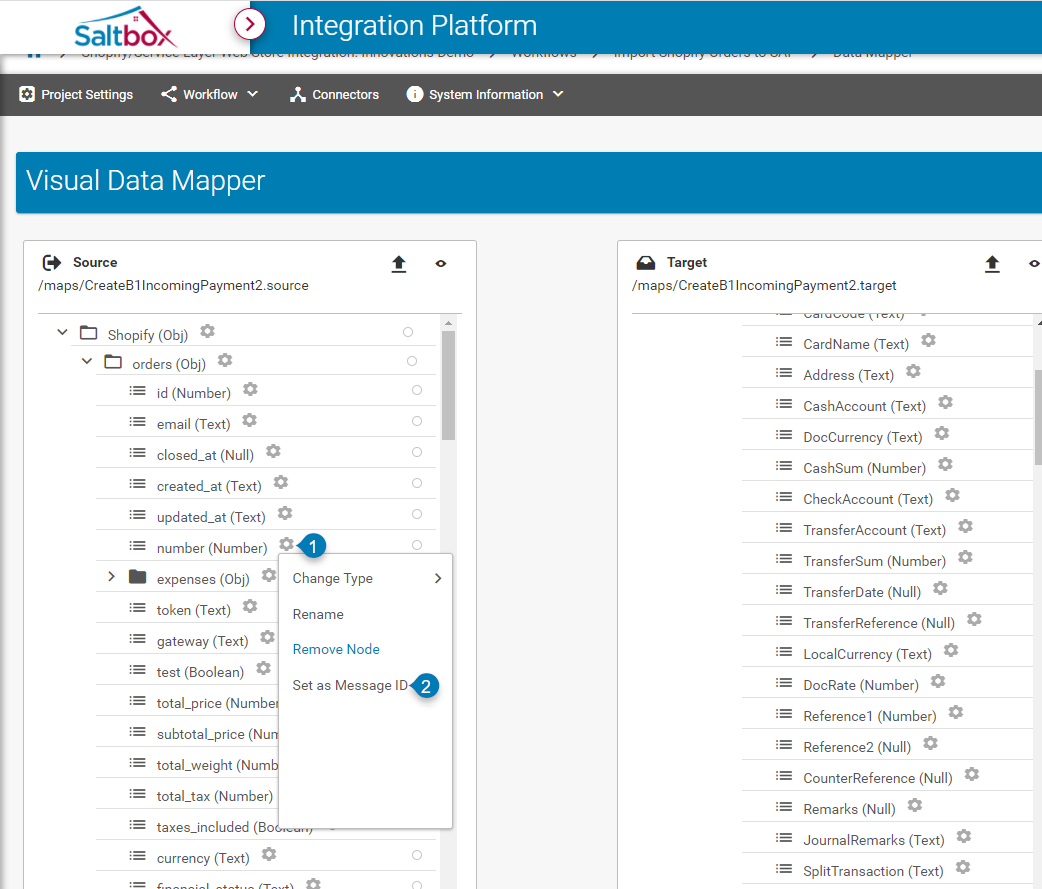
- Save the visual data map. The workflow will use this path as the message ID on the next workflow execution. The engine does not need to be restarted.
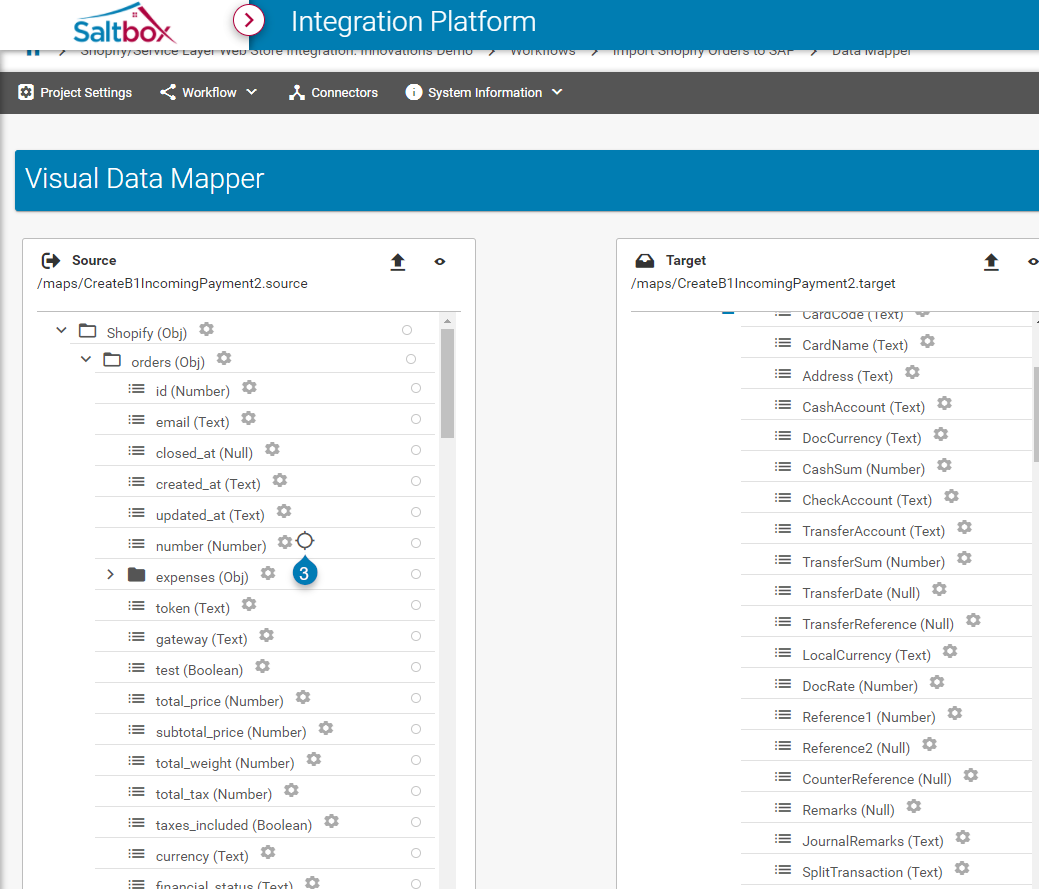
Once assigned, the element will be marked, as shown below:
To remove the ID Path, open the options menu for the mapped element and “Unset as Message ID”, or edit the Workflow Trigger.
Step 4: Configure Raw Message Settings
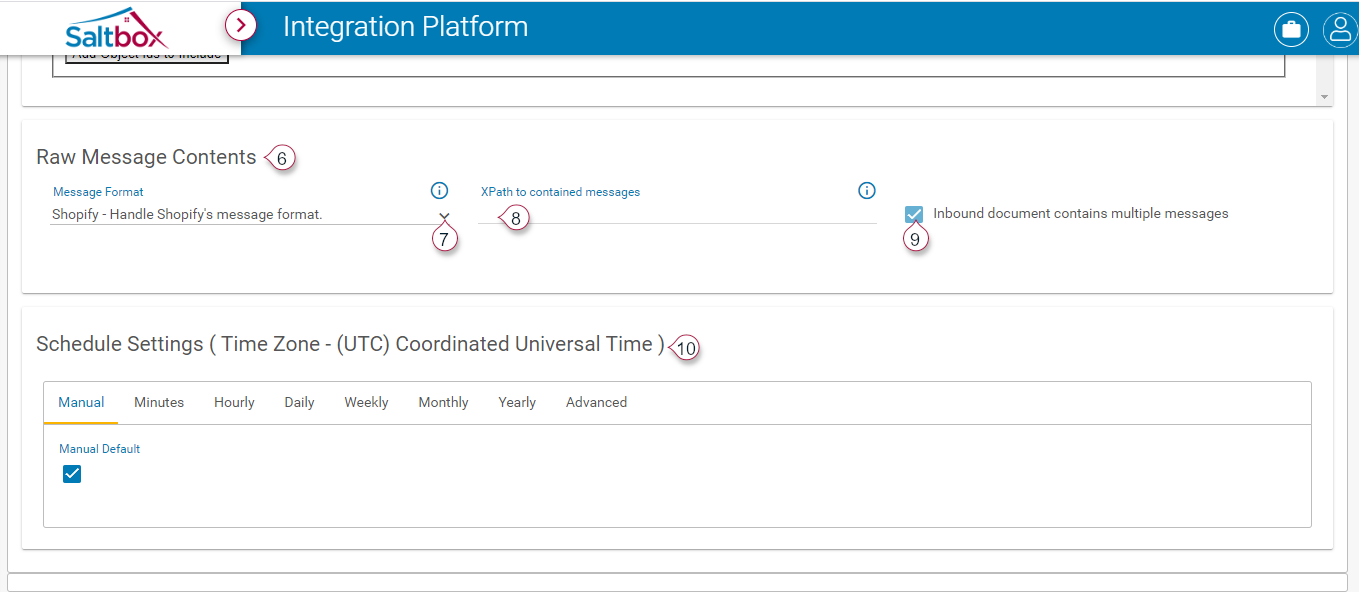
This advanced setting is only needed for some Connectors. In most cases this can be left assigned to the selected default.
This section defines how triggered messages are converted into a format that Saltbox understands. For example, Shopify and Service Layer use JSON Message Format, while a file loaded through the SFTP connector may use the XML or CSV options.
CSV Example
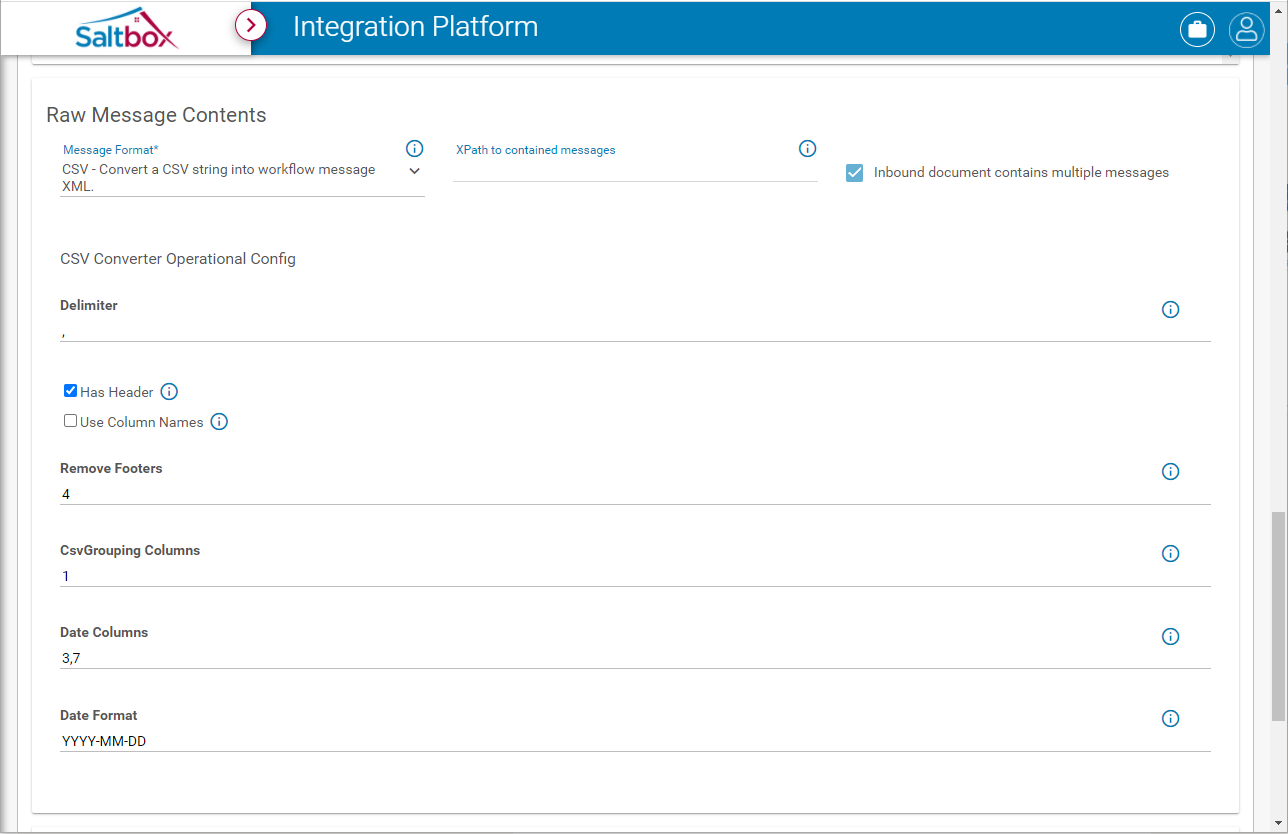
As of Core Connector version 10.2.1, when using the CSV Message Format option advanced settings CSV Converter Operational Config are displayed.
Descriptions and examples for each field are provided in the info icon to the right of each field.
In this CSV Example:
- Delimiter:
,- CSV data is delimited by a comma. - Has Header is checked, Use Column Names is unchecked - CSV File includes a header row, which will be stripped out of the resulting message data.
- Remove Footers:
4- There are 4 footer rows which are not needed in the message data. - CSV Grouping Columns:
1- Data should be grouped by the first column. - Date Columns
3,7- Columns 3 and 7 are date columns that should be formatted. - Date Format:
YYYY-MM-DD- Date formatting will be applied to columns 3 and 7 based on this setting.
Step 5: Configure Schedule Settings
If workflows should run on a schedule, assign a schedule to the trigger (marker 10 above).
Step 6: Save
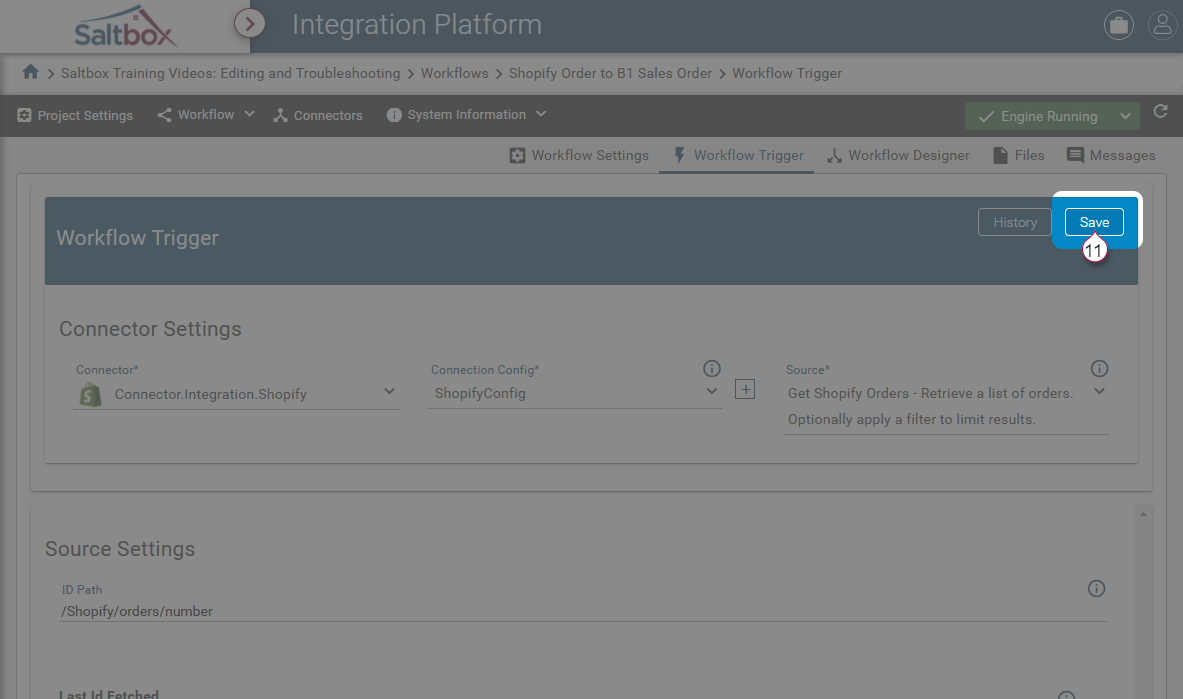
Use the Save button on the upper right to save changes.