
Simple Branch Setup within a Workflow
Simple branches are basic containers for workflow actions. Each workflow starts off with a Simple branch, and further branches may be added to contain related groups of actions, or, more commonly, to define flow control using If/If-Else branches or ForEach branches.
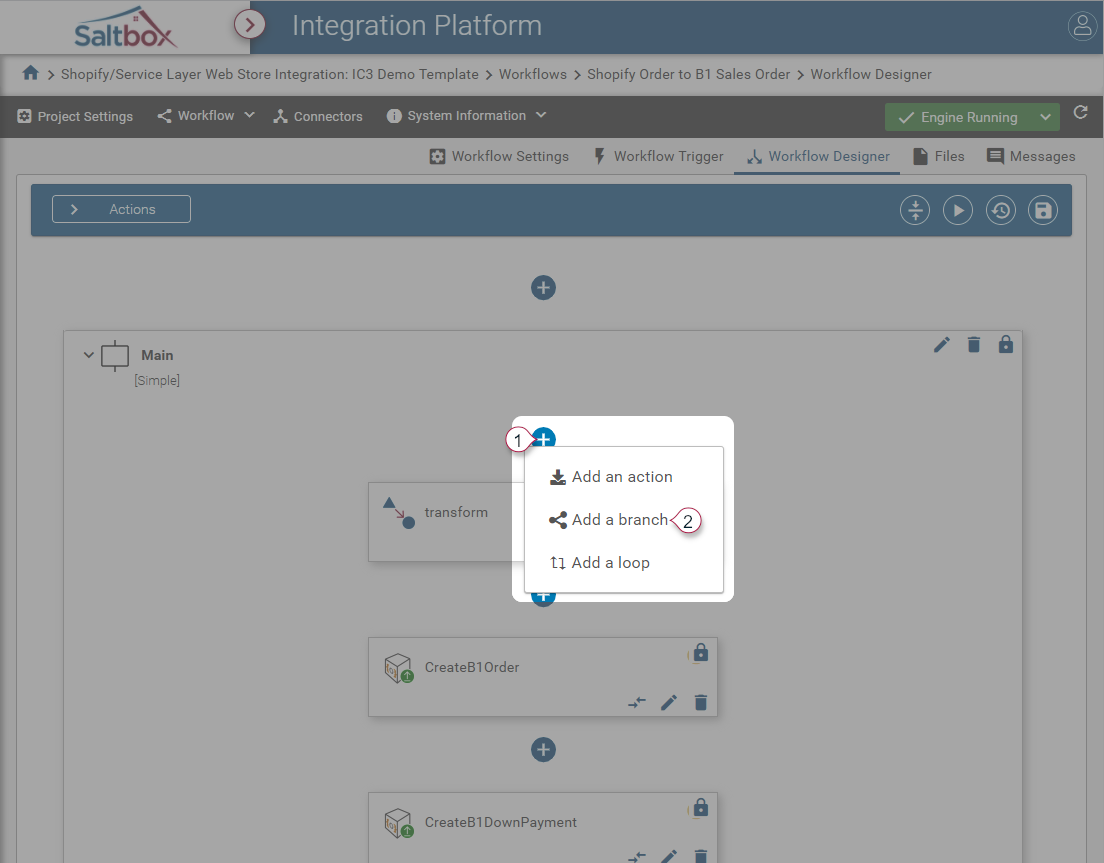
Step 1: Identify where the branch will be added
A new Simple branch will either be contained within another branch, or will be used to add another container to the workflow.
Step 2: Add the branch
-
Use the + button at the desired location.
-
Select “Add a branch” if this is a nested branch. Otherwise the branch is added automatically and may be configured as outlined below.
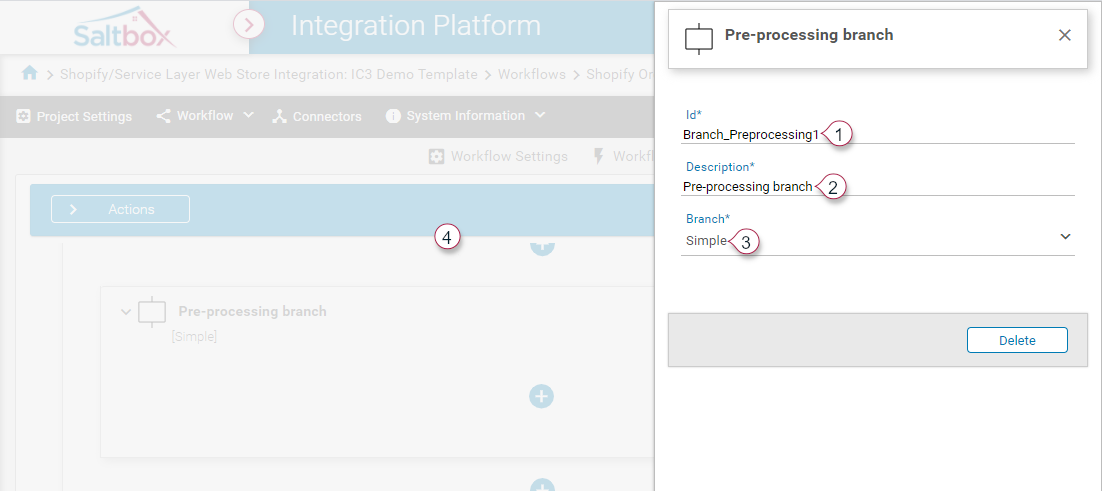
Step 3: Configure the branch
Because this is a simple branch, only basic details are required, such as Branch ID and Description.
-
Update the Branch ID to something meaningful to an admin. While not required, this will make it easier to trace through logs if troubleshooting is required.
-
Update the Branch Description. Again, this will aid in troubleshooting.
-
Select “Simple” branch type.
-
Navigate back to the main workflow.
Step 4: Add at least one action
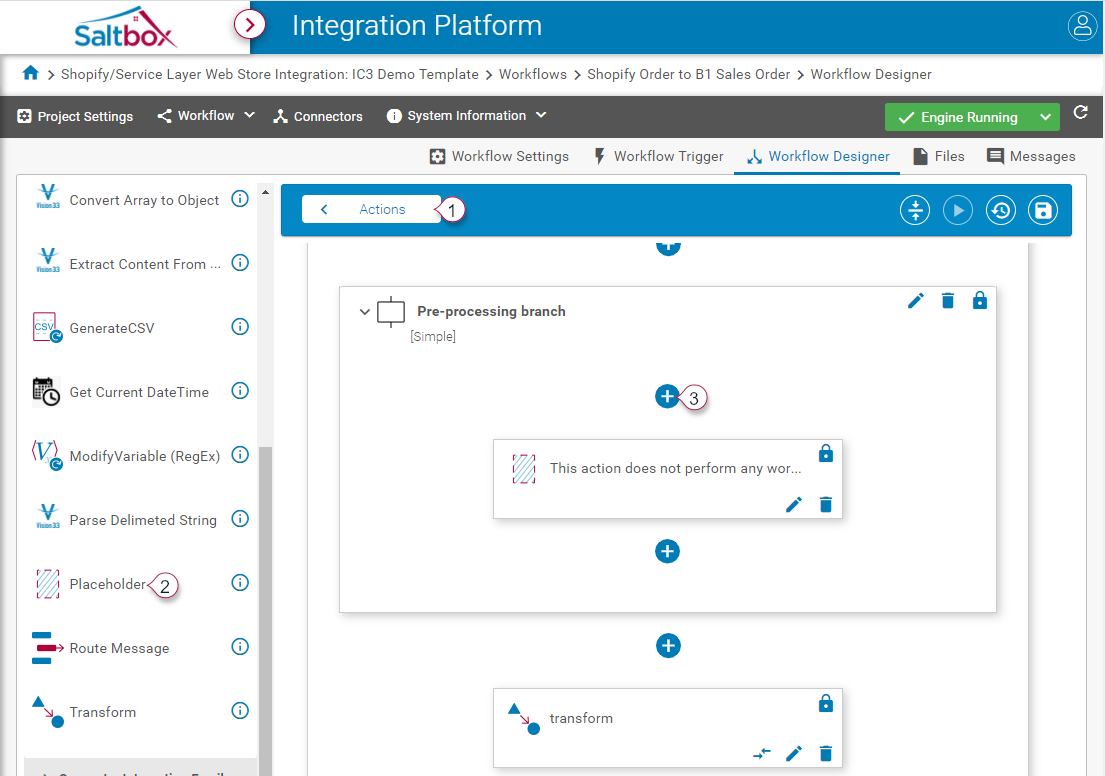
Branches are used to group together actions within a workflow, so at least one action is required.
Placeholder actions do not perform any business logic, so are a good option when scaffolding out a new workflow. Or, add the desired actions to the branch.
Step 5: Save changes
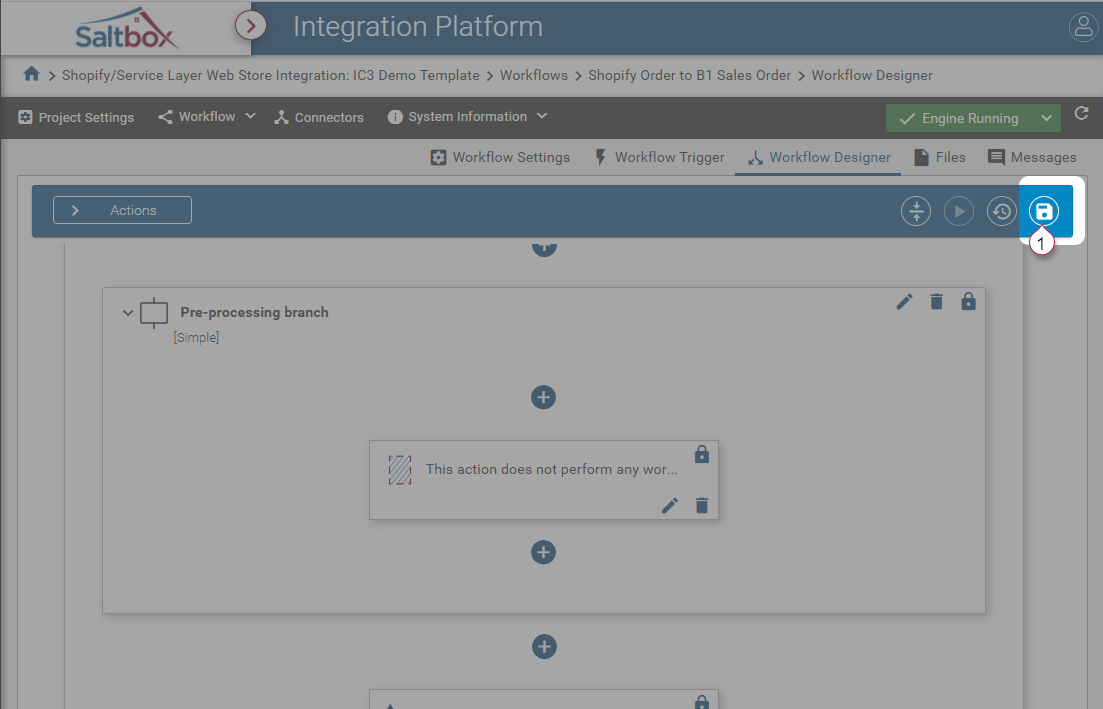
Use the workflow save button to save any branch configuration, and add comments describing what was changed.
This will apply changes immediately and allow the workflow to use the latest version of the workflow, including the new branch.