
Creating a New Workflow
Workflows are at the heart of every Integrations project. They define the actions used to complete a business process.
Before you begin
Before they can be configured, workflows require a project and connectors. This is completed as part of a project environment’s setup and must be in place before workflows can be designed.
Work with a Saltbox implementation consultant to identify whether this step is complete, then the walkthrough below can be used to create workflows within that project environment.
Step 1: Confirm Project Details
As mentioned above, a project must first be set up before a workflow can be added and designed.
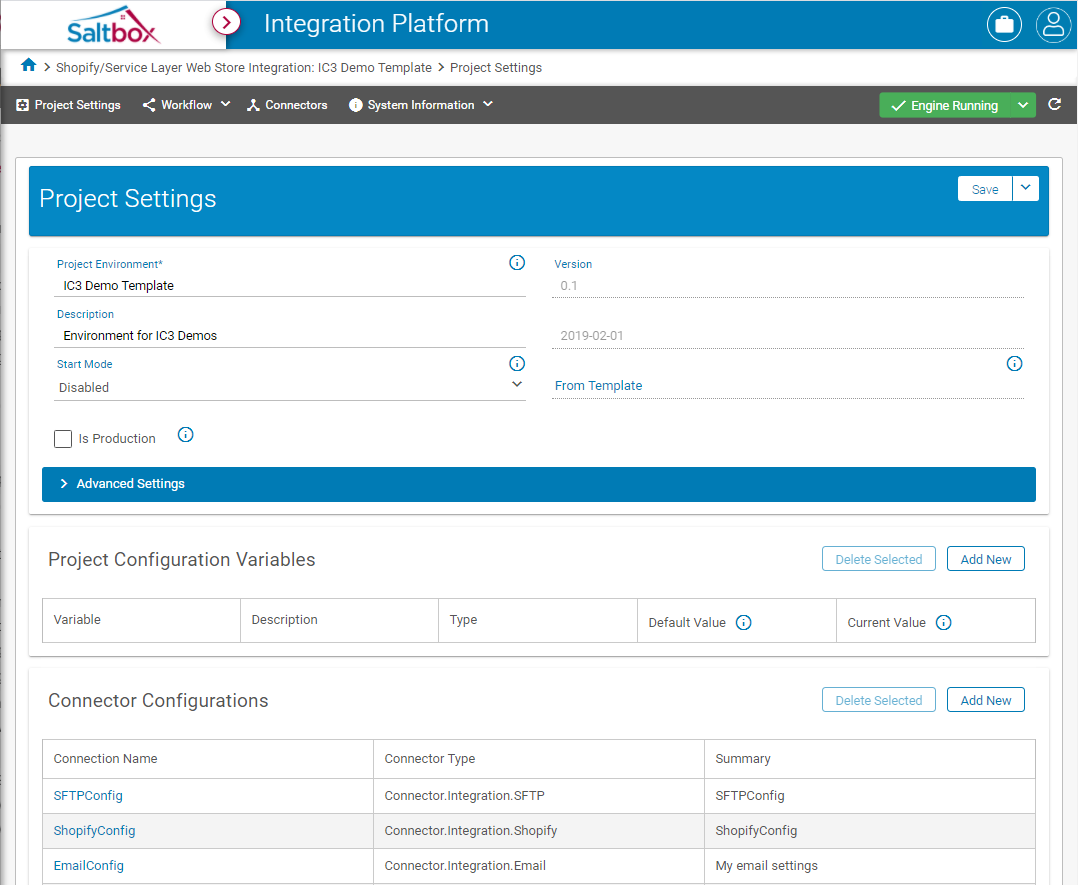
Additionally, each Connector that needs to be used by the workflow must have one or more Connector Configs. Configs can be managed on the Project Settings screen, shown below. For more details: See Project Settings Walkthrough.
Step 2: Create a new workflow
-
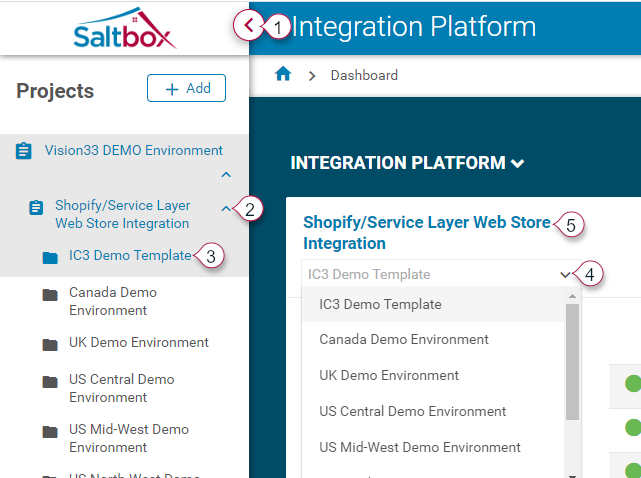
To create a new workflow, open the project environment. Use the left-hand menu, or drill down into environment from the Integrations dashboard.
Option 1 - Side Menu: Expand the side menu (marker 1 below) and expand the project (marker 2 below). Open the desired environment (3).
Option 2 - Dashboard: From the Dashboards landing page, select an environment (marker 4 below) and follow the project link (5) to open the selected environment.
-
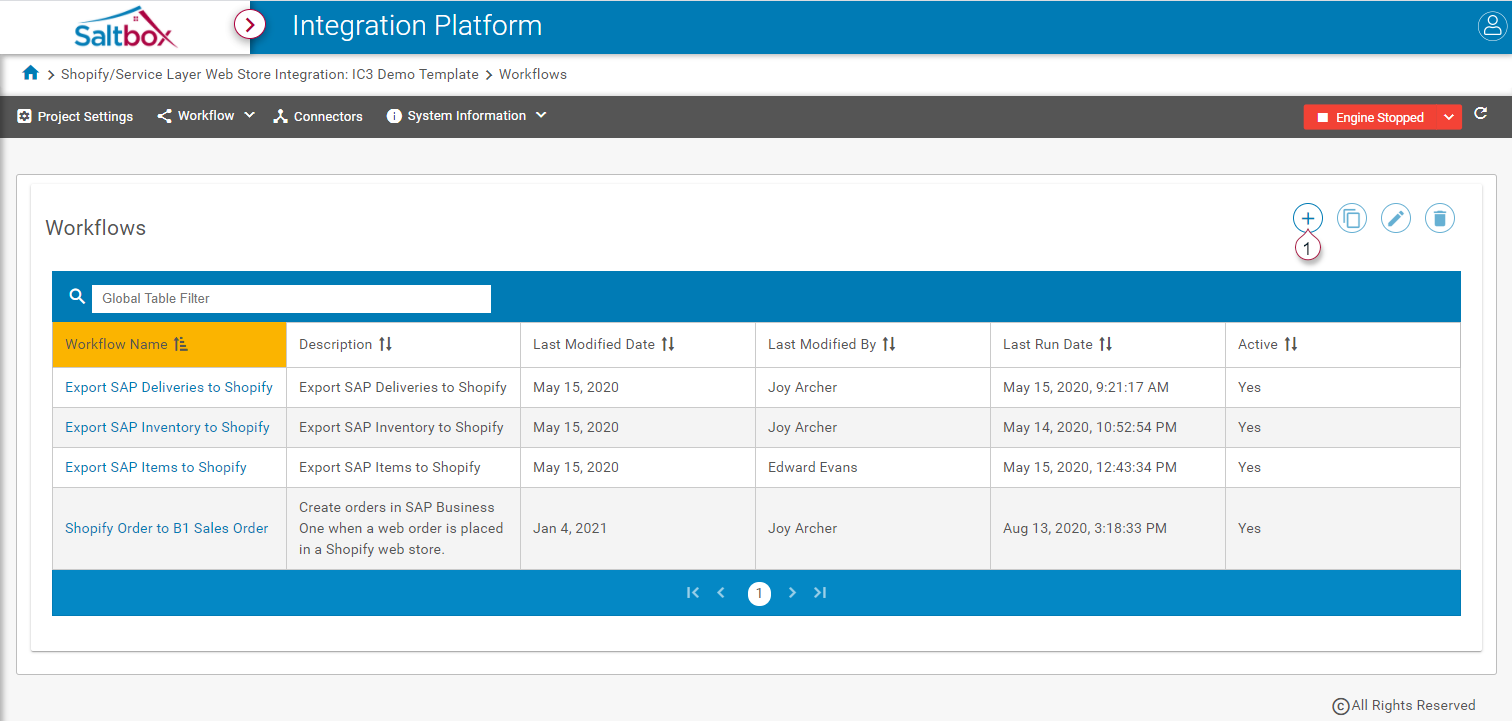
From the Manage Workflows screen, press add new (marker 1 below).
-
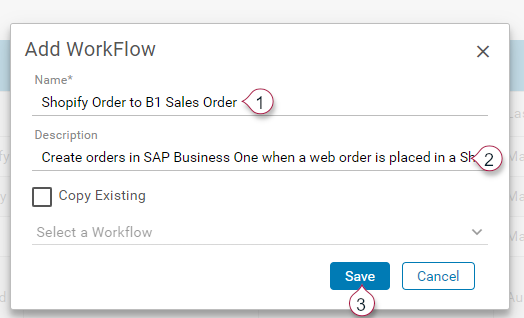
Fill in basic workflow details, shown here “Shopify Order to B1 Sales Order” workflow and its description.
Step 3: Configure Workflow Settings
-
Typically, this can remain unchanged to use default options, however a brief summary of the available options are shown below.
Don’t see the options you’re expecting? Don’t worry, they’re still there! In version 2.6, settings and trigger options were moved around but remain intact.
-
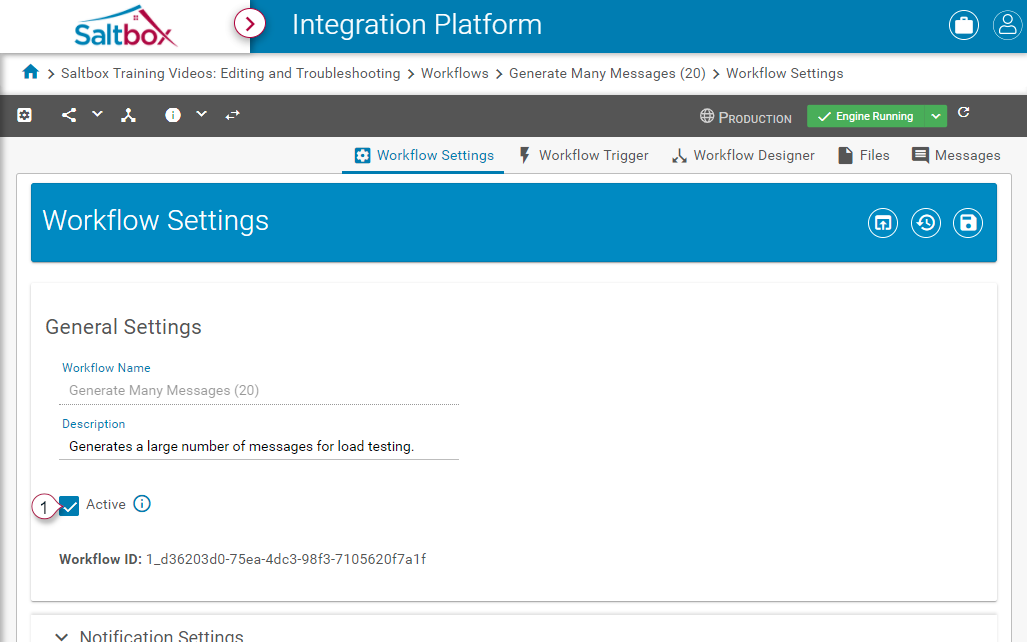
General Settings define the basic workflow details (name, description, and whether a workflow is active). Before a workflow can be run, it must be flagged as
Active(marker 1 below). -
Notification Settings specify whether to send emails when a workflow fails. The option
Send Email Alert on all Retry Attemptswill only send emails if the workflow trigger is configured to support Retries. -
Advanced Settings allow API Gateway to be activated (if applicable). For more information about API Gateway, see API Gateway Overview.
-
Workflow Variables may be configured for use within the workflow design or mappings.
-
-
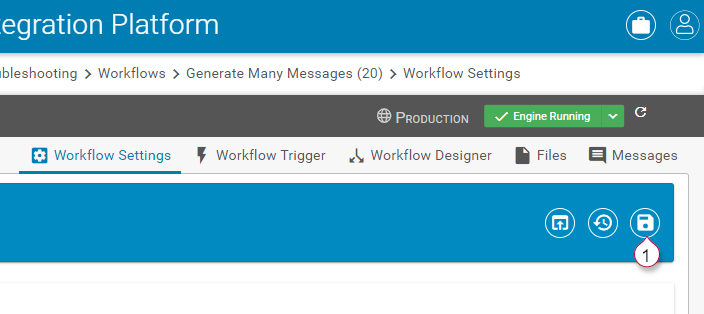
Save settings after making any changes.
Step 4: Set up a Workflow Trigger
-
Open the Workflow Trigger page (marker 1 below).

- Choose the Connector, Config, and data Source (markers 2, 3, 4 above). These settings identify where the data will come from.
- Connector determines the end-point that will serve the data, such as an ERP system like SAP Business One, or a file system, such as SFTP.
- Connection Config selects the account settings for the selected Connector.
- Source selects the type of data to be retrieved, such as Order data (shown above), customer data, CSV or other Connector-specific sources of data.
-
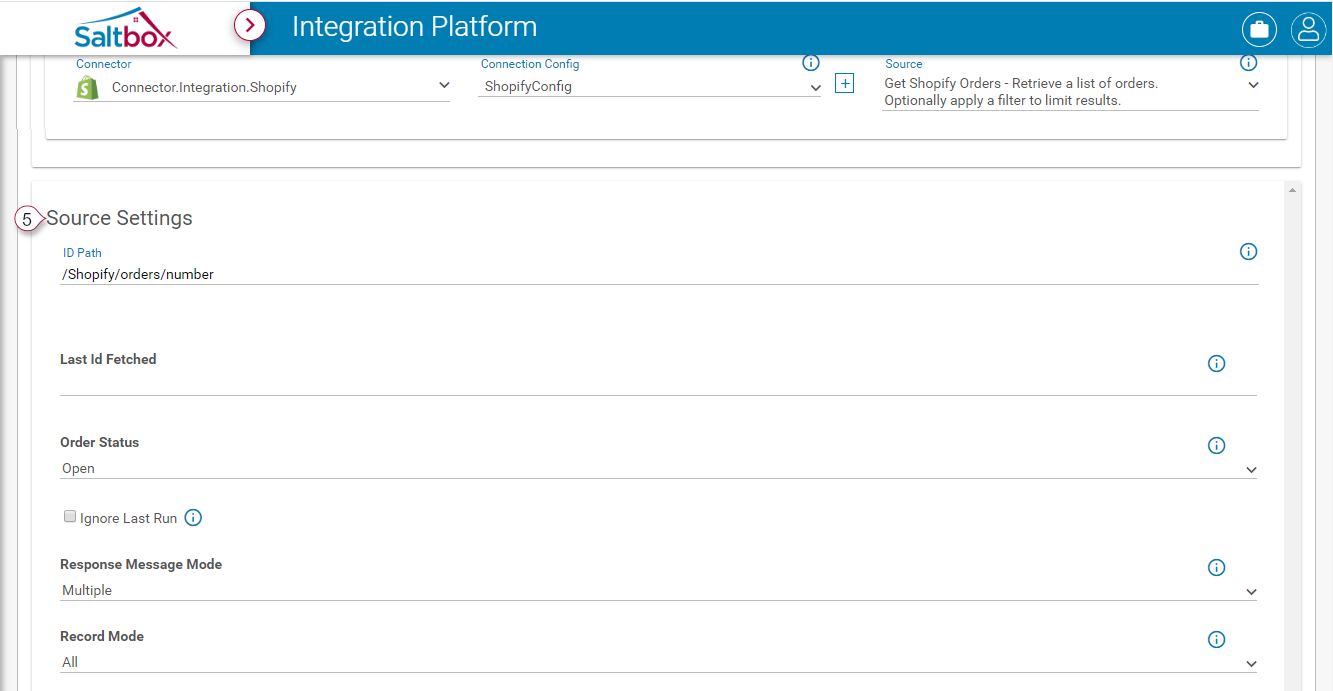
Provide Source Settings (marker 5 below). Note that each Source within a Connector has different configuration needs. Not all fields are required, and only options that apply to the selected source will be displayed.
For example, the following screenshot displays some of the configuration options for Getting Shopify Orders, which is different from what’s needed to fetch an SFTP file, or to query a database.
-
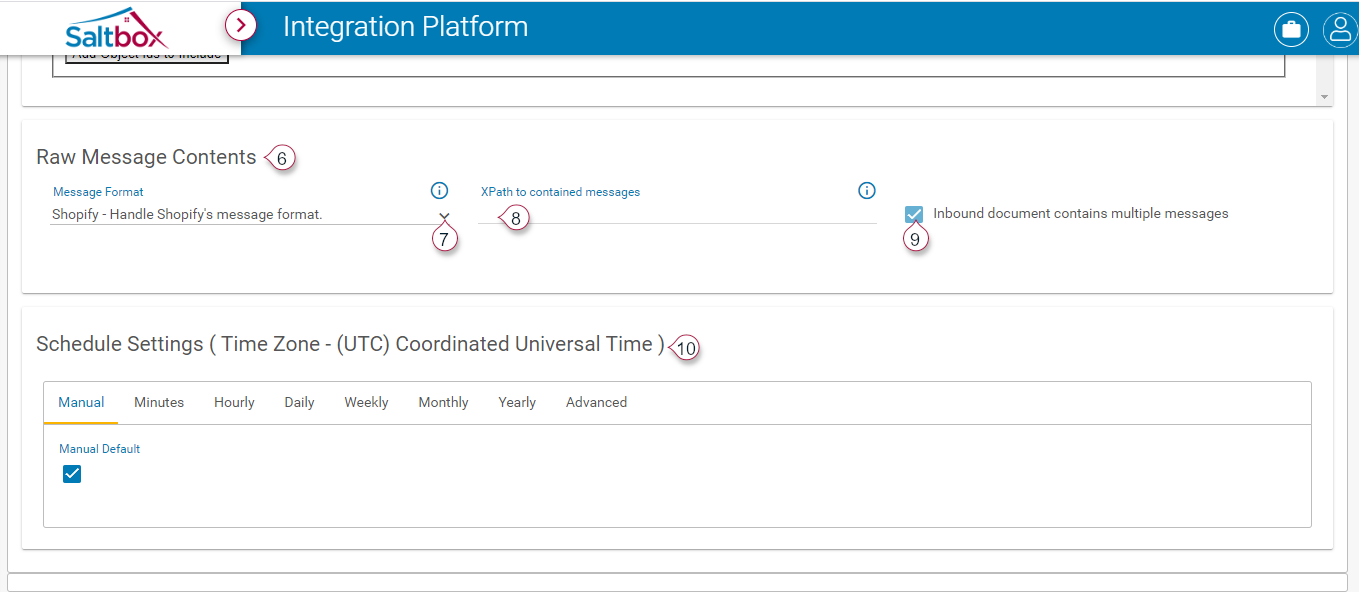
Set Message Format options (marker 6 below). In most cases, the default option is auto-selected, and no change is necessary.
In the case of some connectors, such as SFTP, the source file may be in a specific format, which may be selected from the Message Format drop-down (marker 7 below).
Message Format is used to convert the message into XML, which allows an XPath to be used to filter on specific data nodes. Use this XPath field (marker 8) to define the node filter.
Finally, if the XPath results in multiple matches, the “Inbound document contains multiple messages” option (marker 9 below) may be used to split the source into multiple workflow executions. This option allows for parallel processing (scaling) when the source contains more than one message to be processed.
-
If applicable, configure Schedule Settings (marker 10 above).
Schedule Settings are configurable for most Trigger sources, excluding Event Triggers and Web Hook Triggers, as these require data to be supplied when initiated.
By default, Triggers are set to Manual mode, which will require the workflow to be executed via the Messages page or Workflow Designer page.
Step 5: Design the workflow
-
Open the Workflow Designer page (marker 1 below).

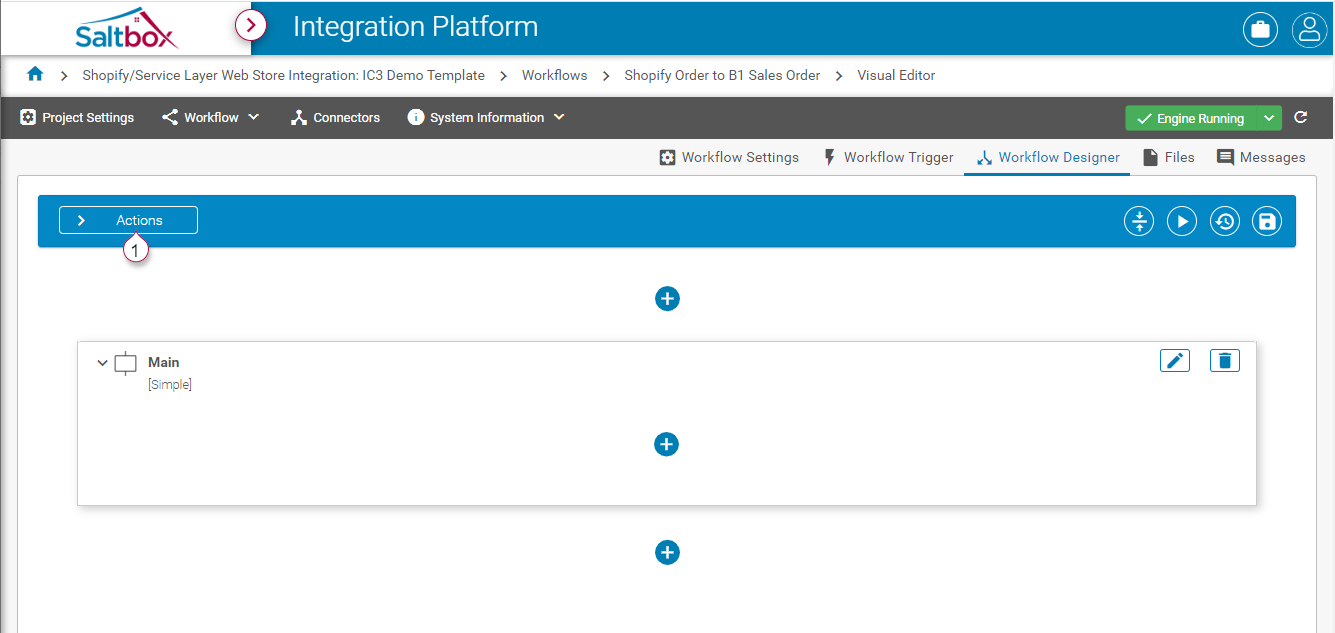
-
Open the Actions pane (marker 1 below).
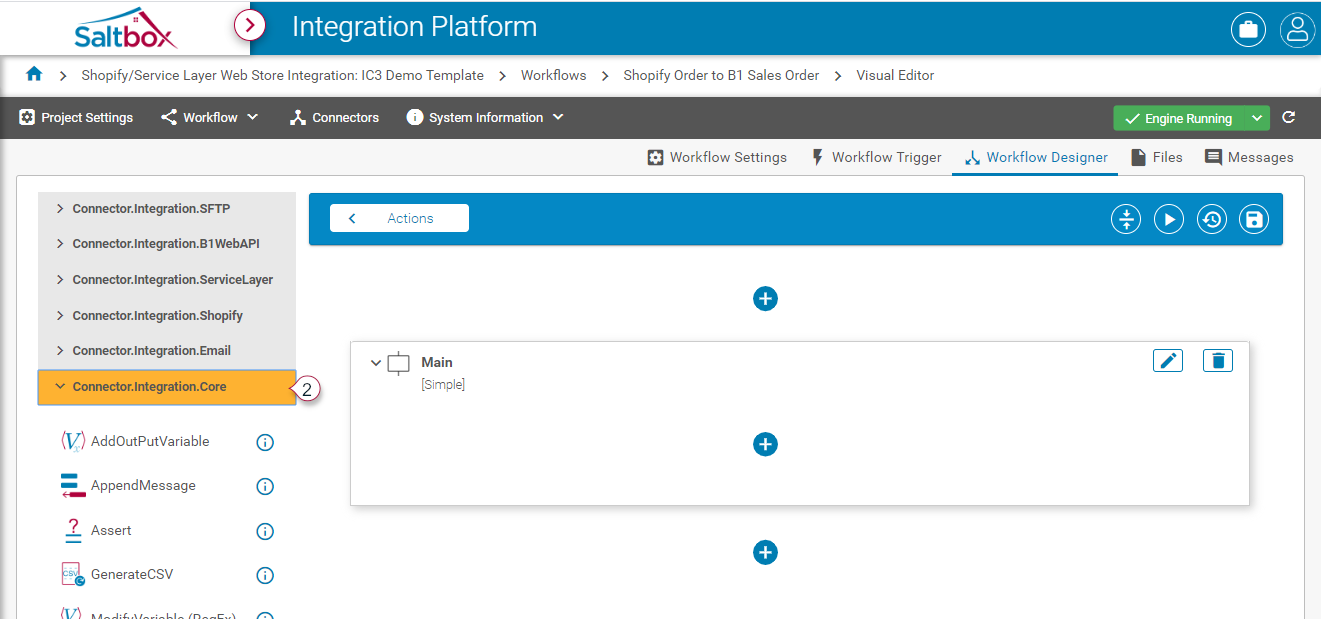
-
Choose a Connector whose actions will be used (marker 2 below).
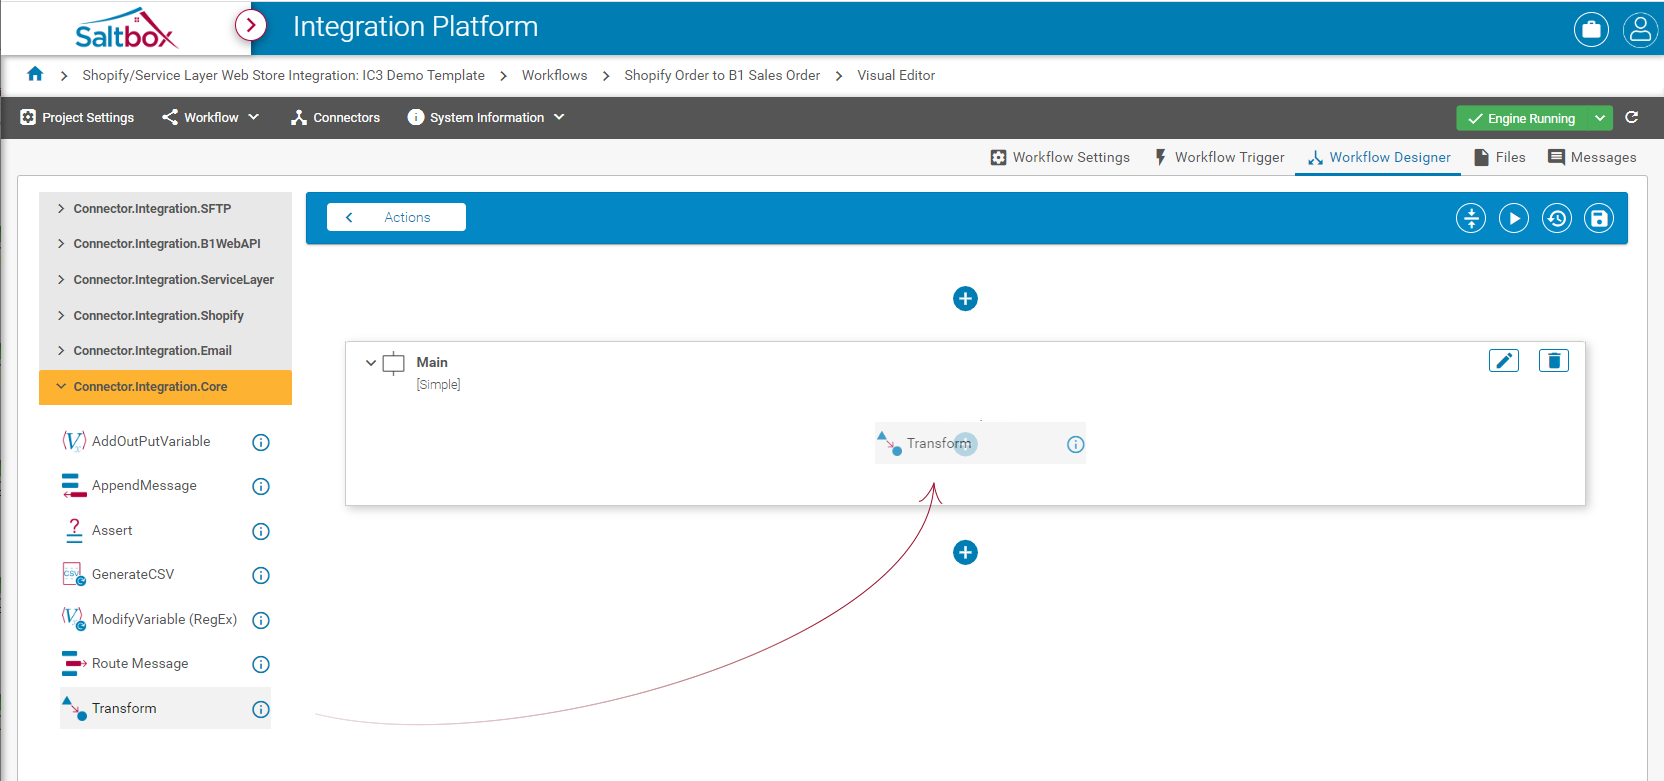
-
Drag the action to the branches pane (ensure the cursor is on top of the + button) as shown below.
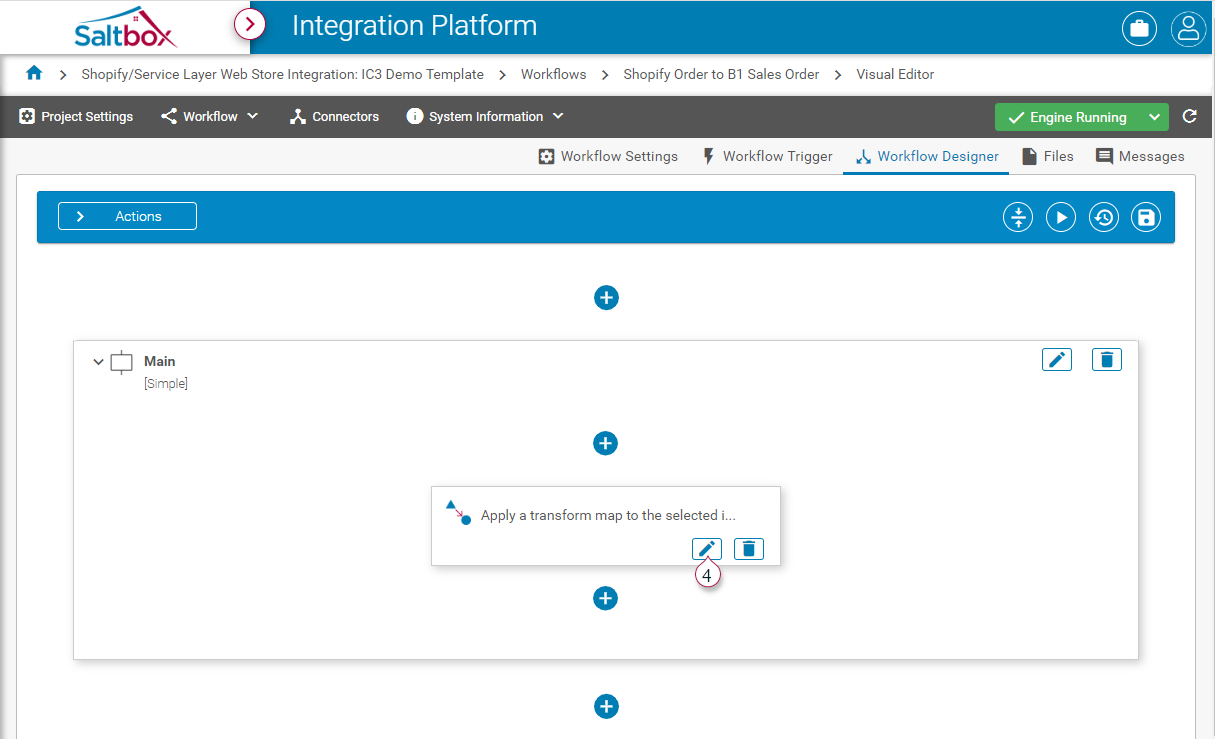
-
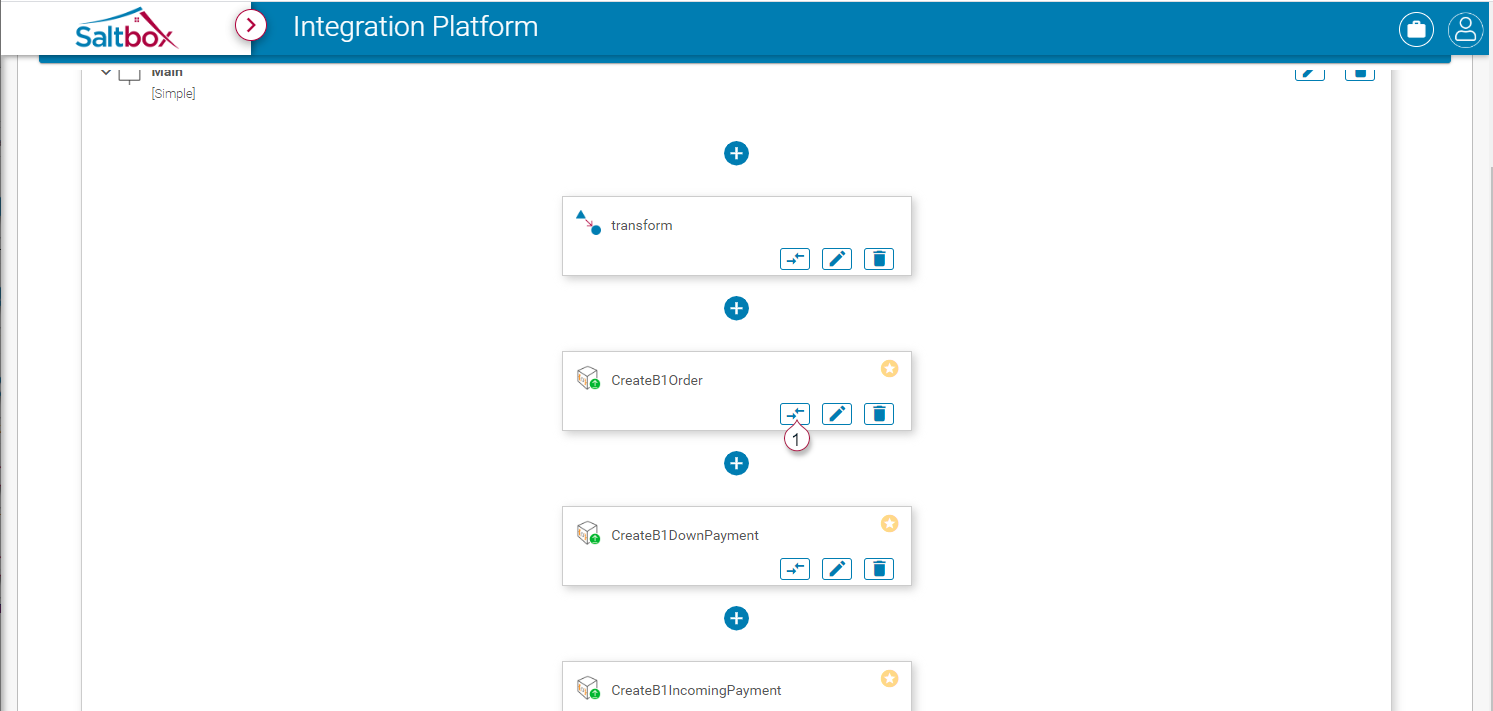
Press the action’s edit button (marker 4 below) to open the action details pane.
-
Edit the action details.
By default, the action’s ID is randomized, and its description is as per assigned defaults. Change the description to something meaningful, and optionally change the ID to something more human-readable, but unique within the workflow.
Alternatively, use the Saltbox Core Connector’s “Placeholder” action to frame up the workflow without filling in all of the details.
Settings (marker 5 below) will vary between Connectors and actions within the same connector. Fill in required details. Note that not all details are required for an action.

-
Save changes (marker 7 below) once the details are confirmed (marker 6 below).
Note that the Save action will prompt for comments. These will help future administrators understand the changes that were applied at each save-point.

Step 6: Map Data (if needed)
Visual Data Mapper is a powerful visual tool that can be used to transform data in one format into something completely different. This works well for scenarios where two different connectors are used within the same workflow.
-
To launch Visual Data Mapper, go to Workflow Designer (marker 1 below).
-
Use the Map button to open Visual Data Mapper for that action’s map. Only actions which have been configured to use a map will display this button.
See Visual Data Mapper Overview for a walkthrough of this tool.
Step 7: Test and Troubleshoot the Workflow Design
Once the workflow is created, testing may be done within workflow designer or the messages page.
- See: Realtime Workflow Testing for a video tutorial.
- See: Manually Running Workflows from the Messages Screen for a walkthrough.
Regardless of which method is used, before you begin testing or troubleshooting, Ensure the Engine is running (See: Engine Management).
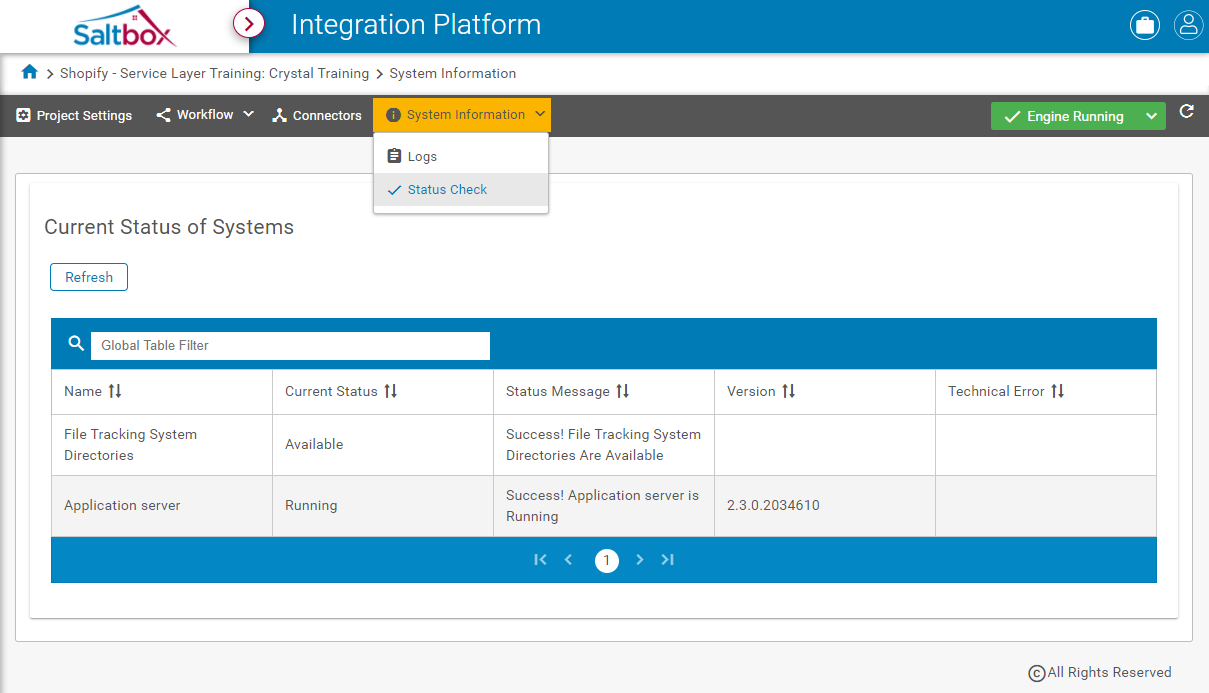
System status may also be inspected on the status page; go to: System Information > Status Check
Step 8: Edit the Workflow Design
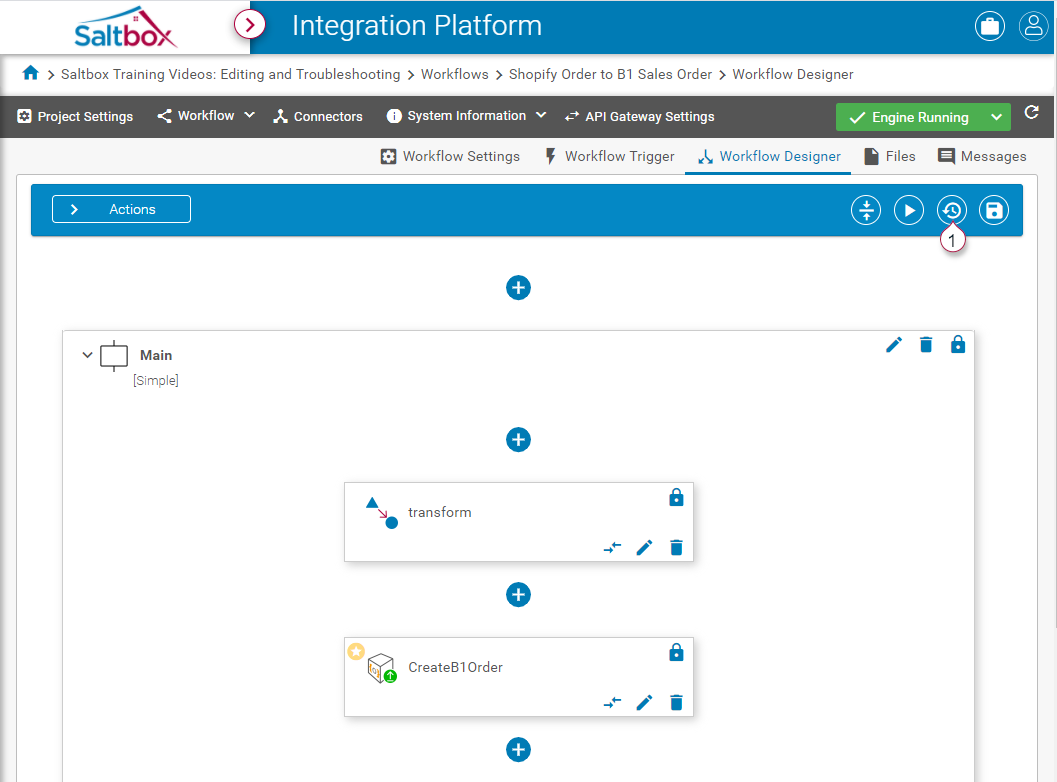
8.1: View History Log
When editing a workflow design, previous changes are saved in a history log. Use the “Load” or “Revert” options to roll back to a previous version of the workflow.
-
Open the workflow history log
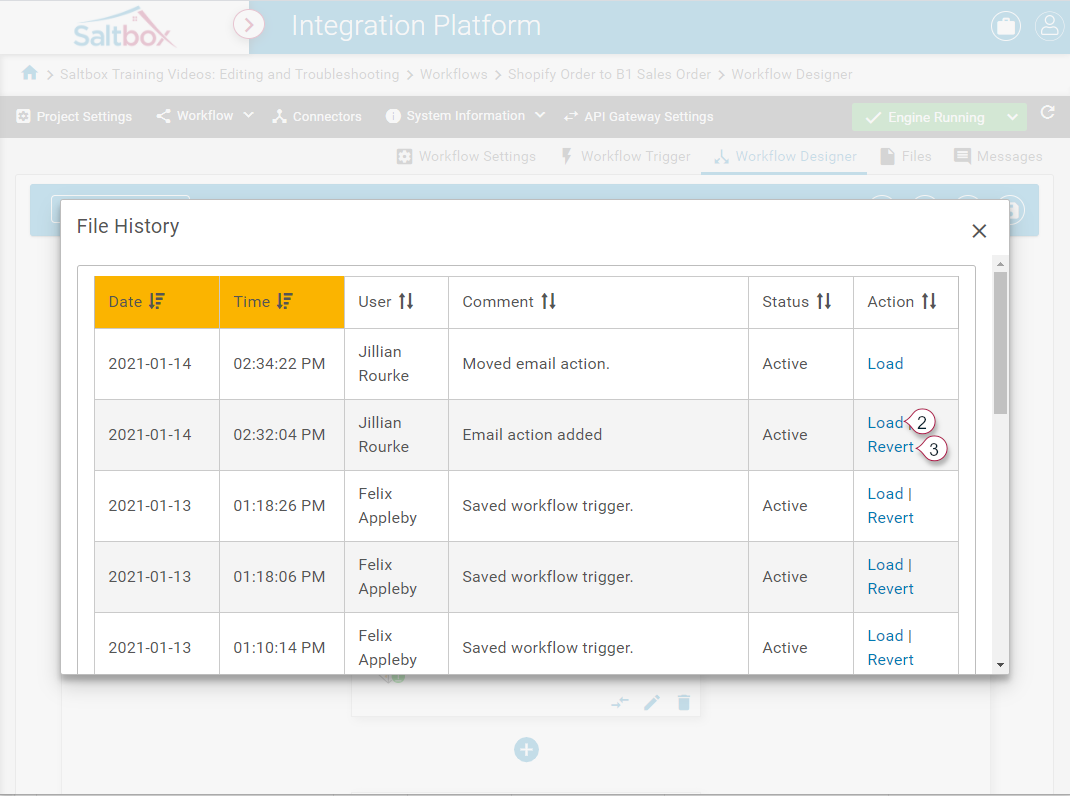
-
“Load” or “Revert” the workflow design.
-
“Load” a previous edit to review it in the designer.
-
“Revert” a previous edit to roll back to that version of the design (including rollback of everything in between). This saves the change with a note in the history log.
-
-
If “Load” was used, save the change apply the roll-back, or navigate to a different page (or refresh) to discard changes.
8.2: Edit an Action’s Position
Drag-and-drop actions within a workflow to maintain configuration while changing when the action is executed within the workflow.