Applying Lookup Mappings in Visual Data Mapper
Lookup Mappings in Visual Data Mapper are a way to look up target values based on a selected source value.
Skip to time code 2:35 in the video above to see a walkthrough of lookup map setup, or follow the tutorial below.
Step 1: Open the Visual Data Map
Visual Data Mapper is opened from within Workflow Designer.
See our step-by-step walkthrough: Opening a Visual Data Map.
Step 2: Drag a source field to the target
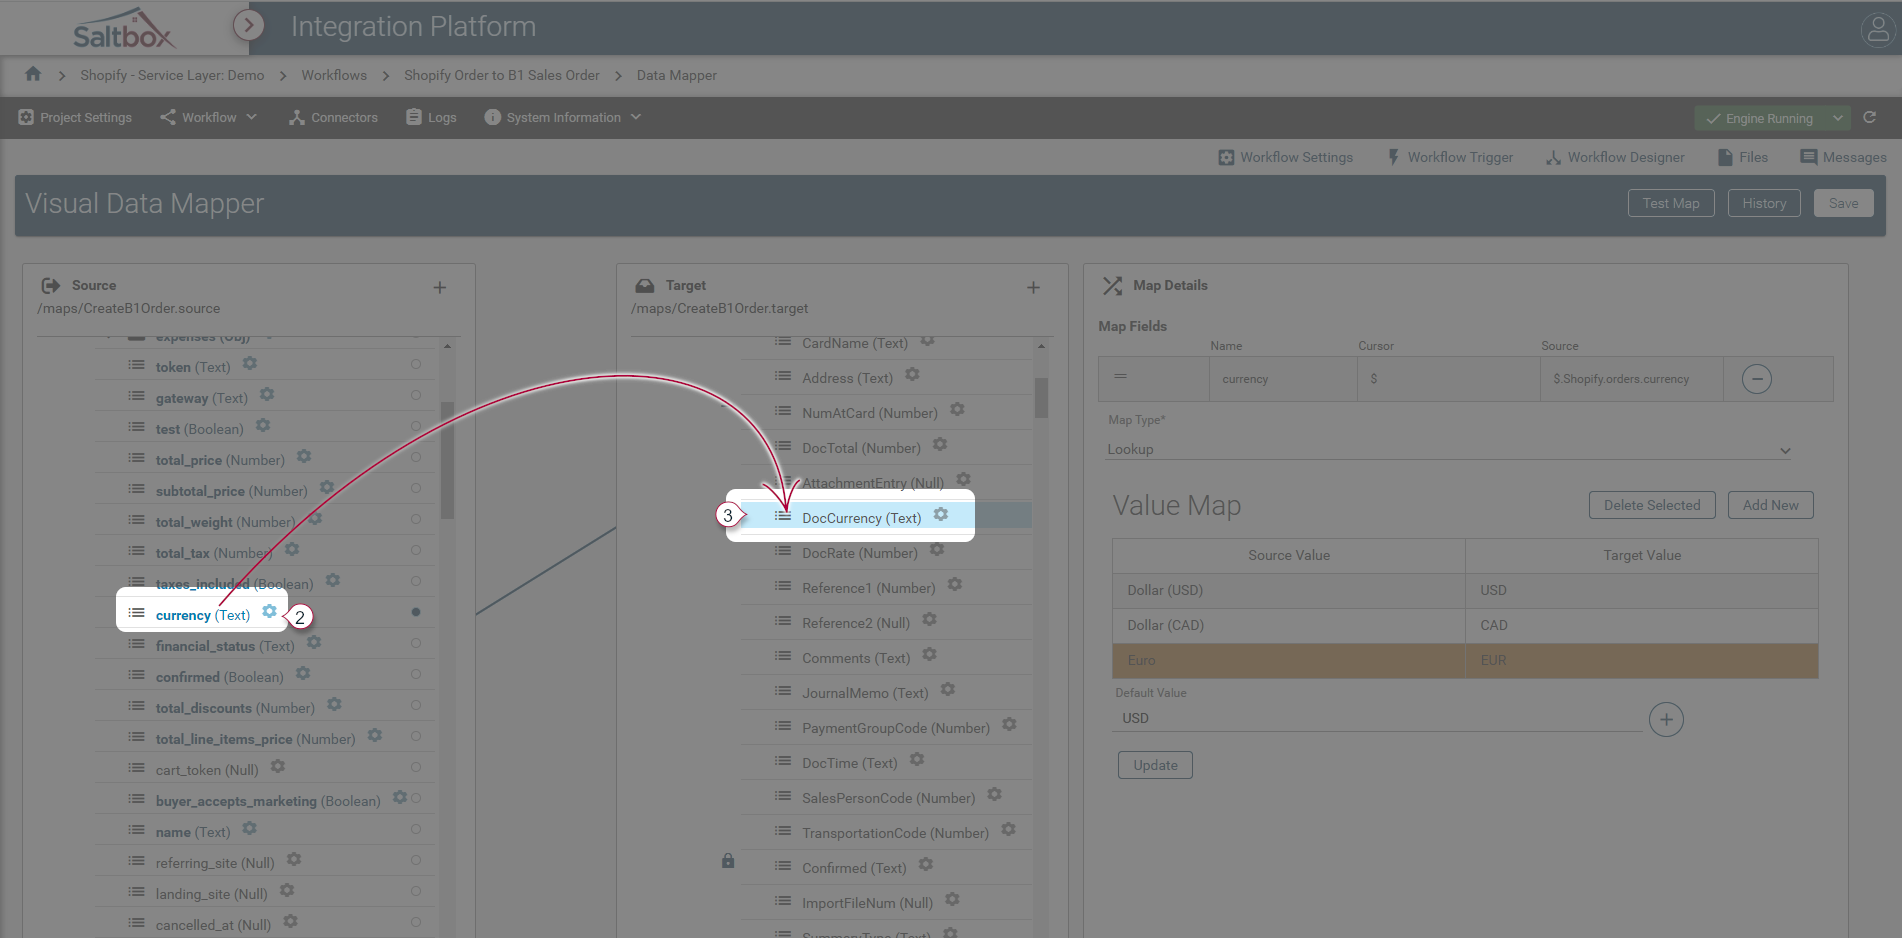
A single source field may be used to look up a value for the target. A source field may be set as follows:
-
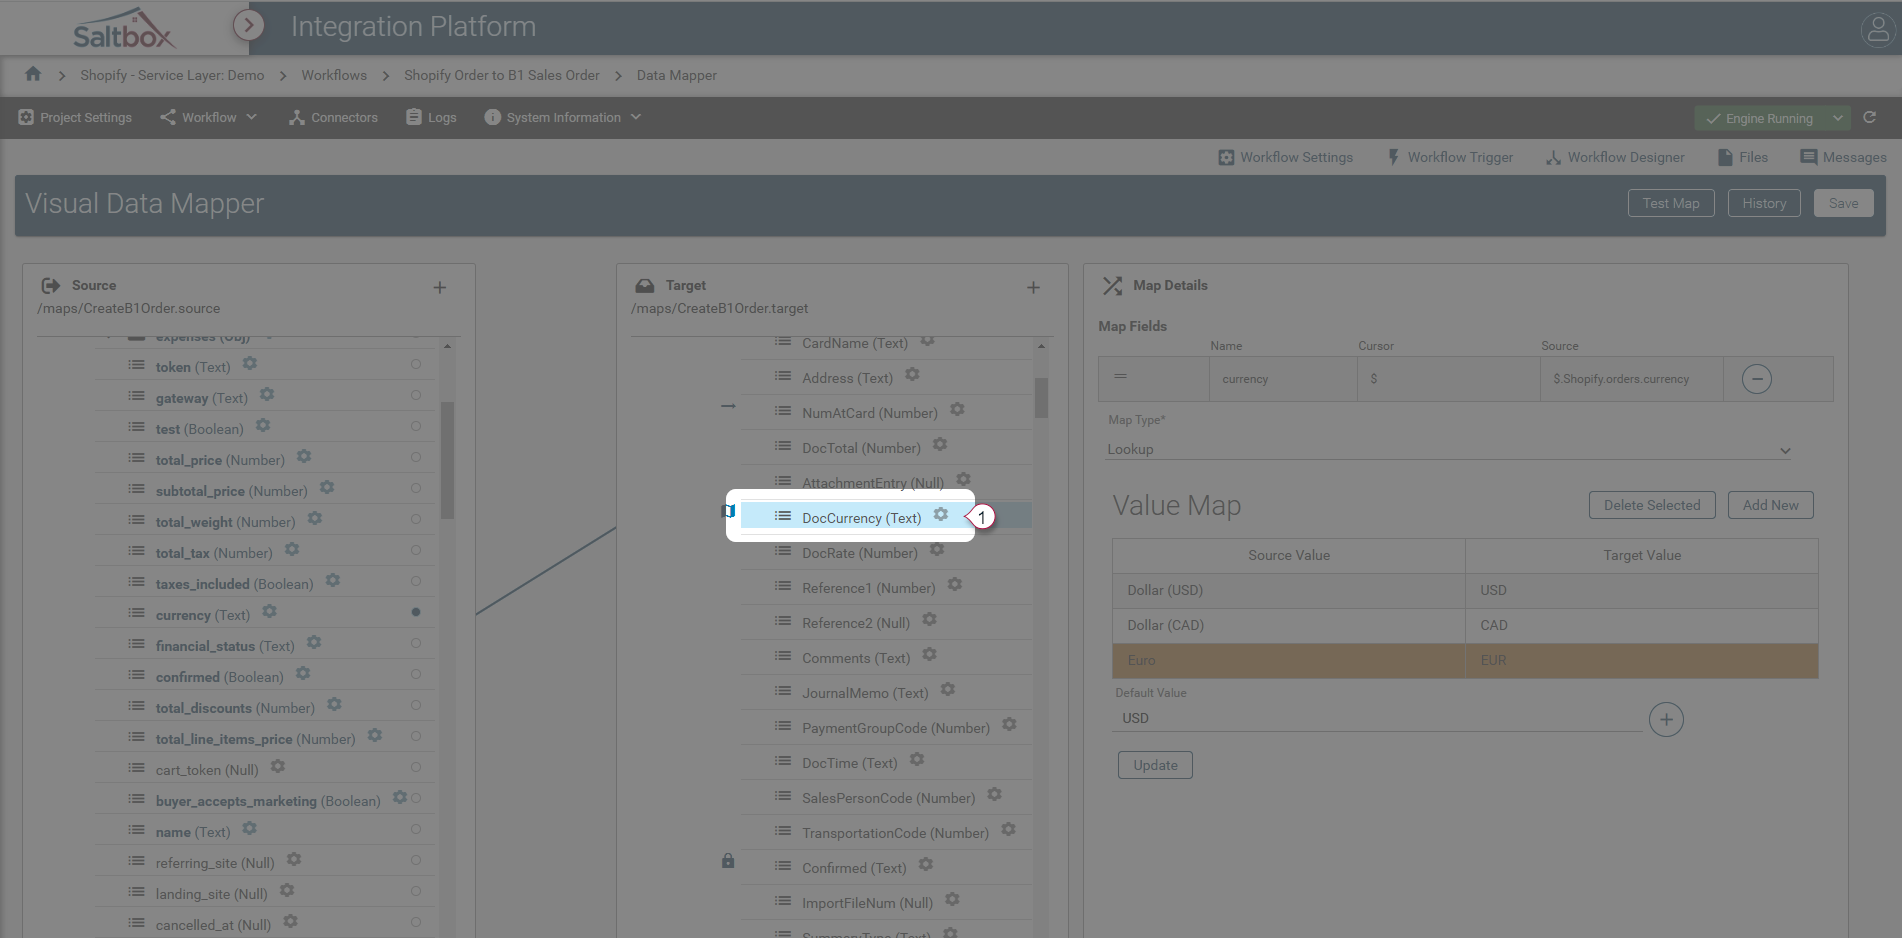
Select the target field on the right that will be assigned via lookup.
-
Drag the desired left-hand source field onto the target field. A single source field may be chosen for a lookup.
Step 3: Set the Lookup mapping details
-
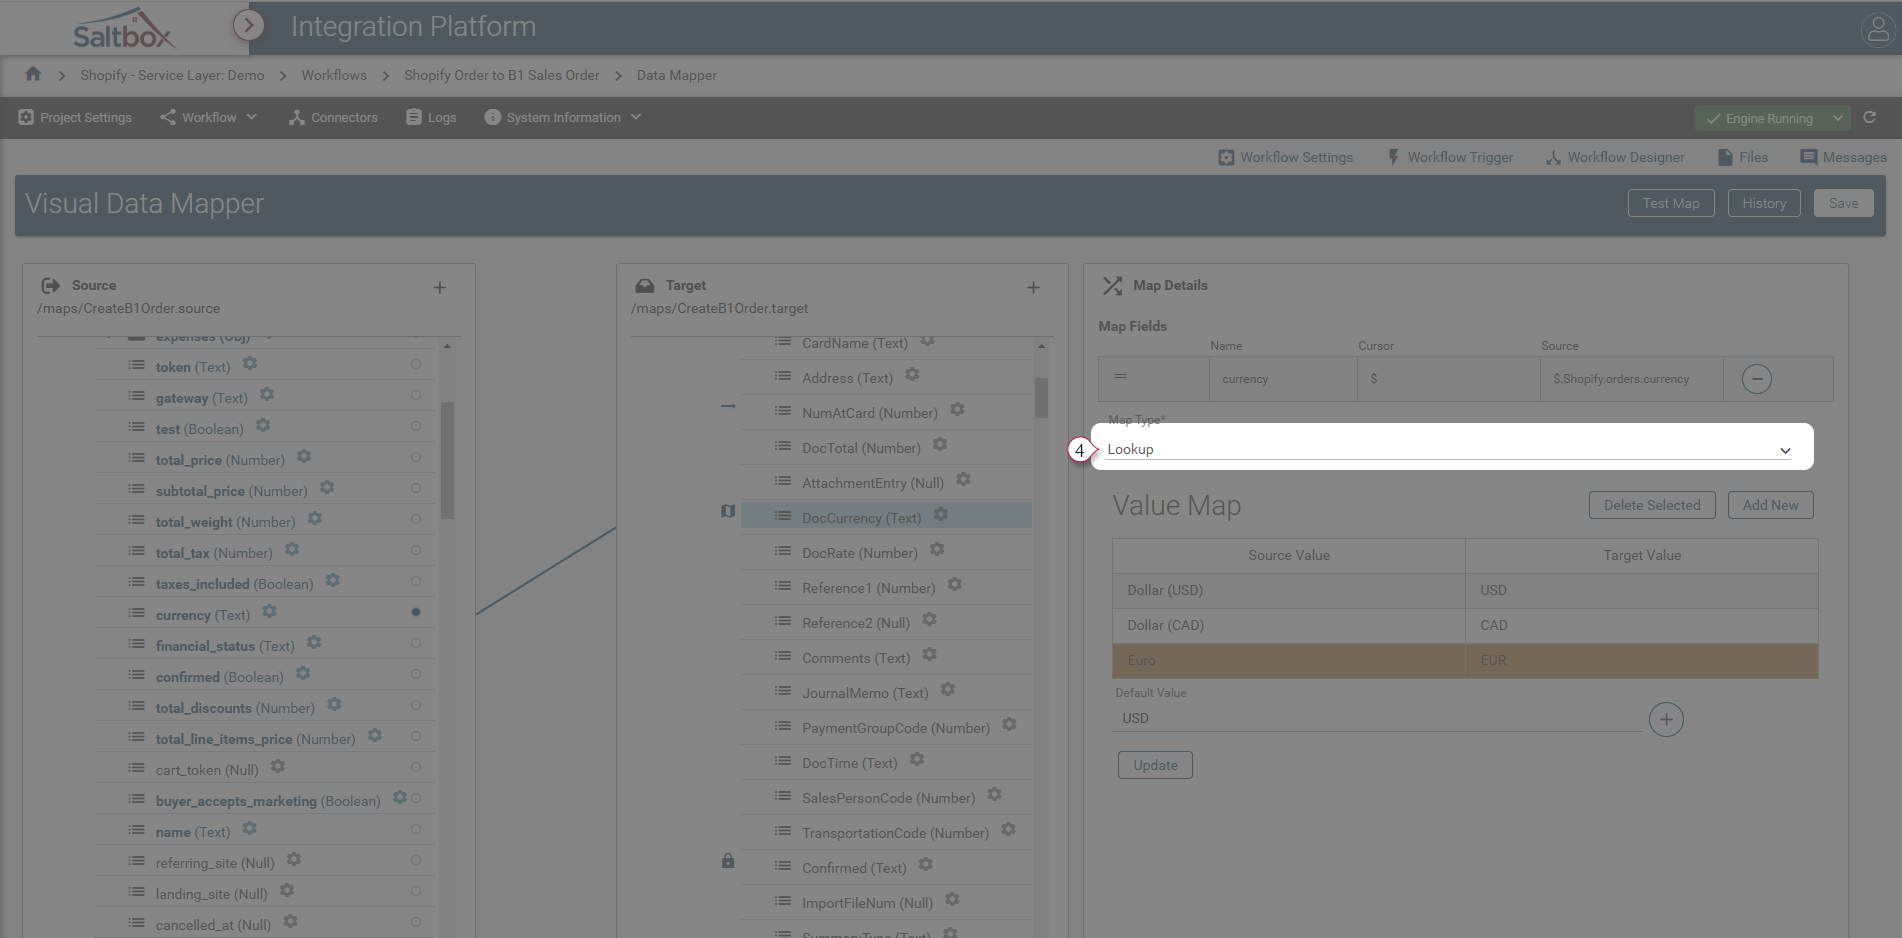
Once source field is added to the target, set the target field mapping type to “Lookup”.
-
Define a Value Map to determine what values will be assigned to the target.
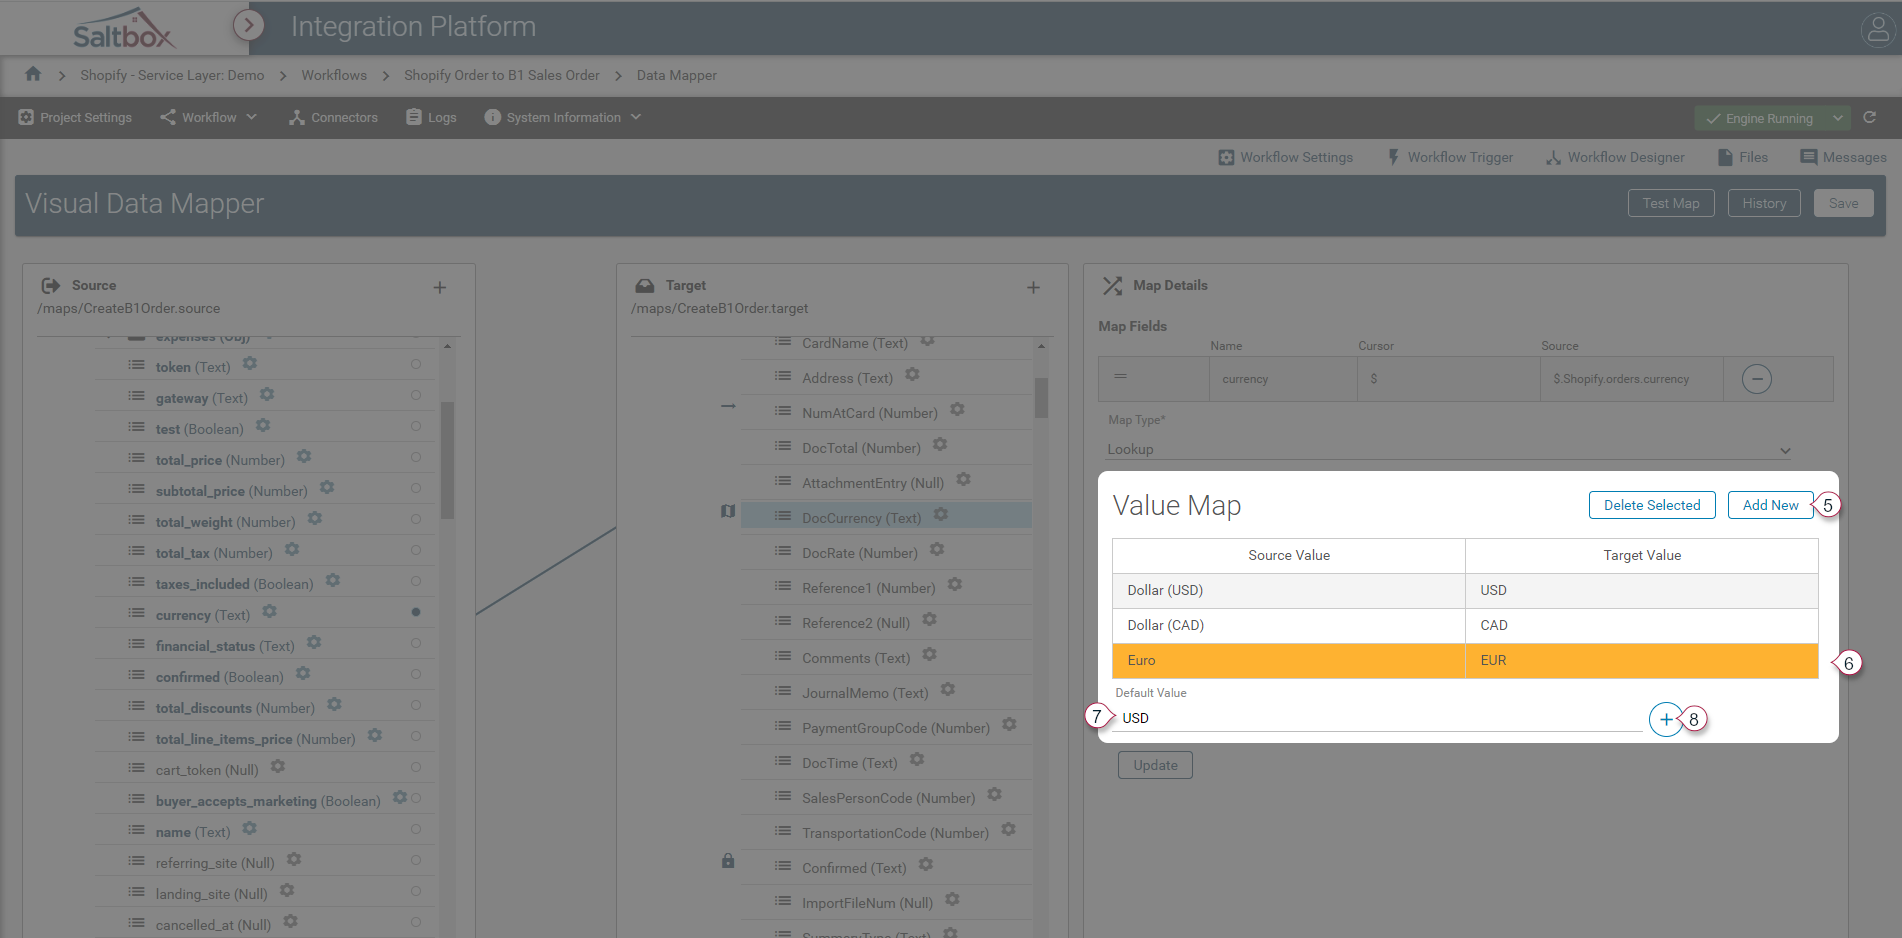
-
Add new rows to the lookup Value Map using the “Add New” button (marker 5 above). Assign Source Values which are found in the source field’s data, and Target Values which are the desired target data for that source lookup.
-
Add a Default Value (marker above) to handle when a source field’s value isn’t found in the Value Map. In the example above, if the source (Shopify) currency isn’t found in the lookup table, a default value of USD will be assigned to the target (B1) currency code.
-
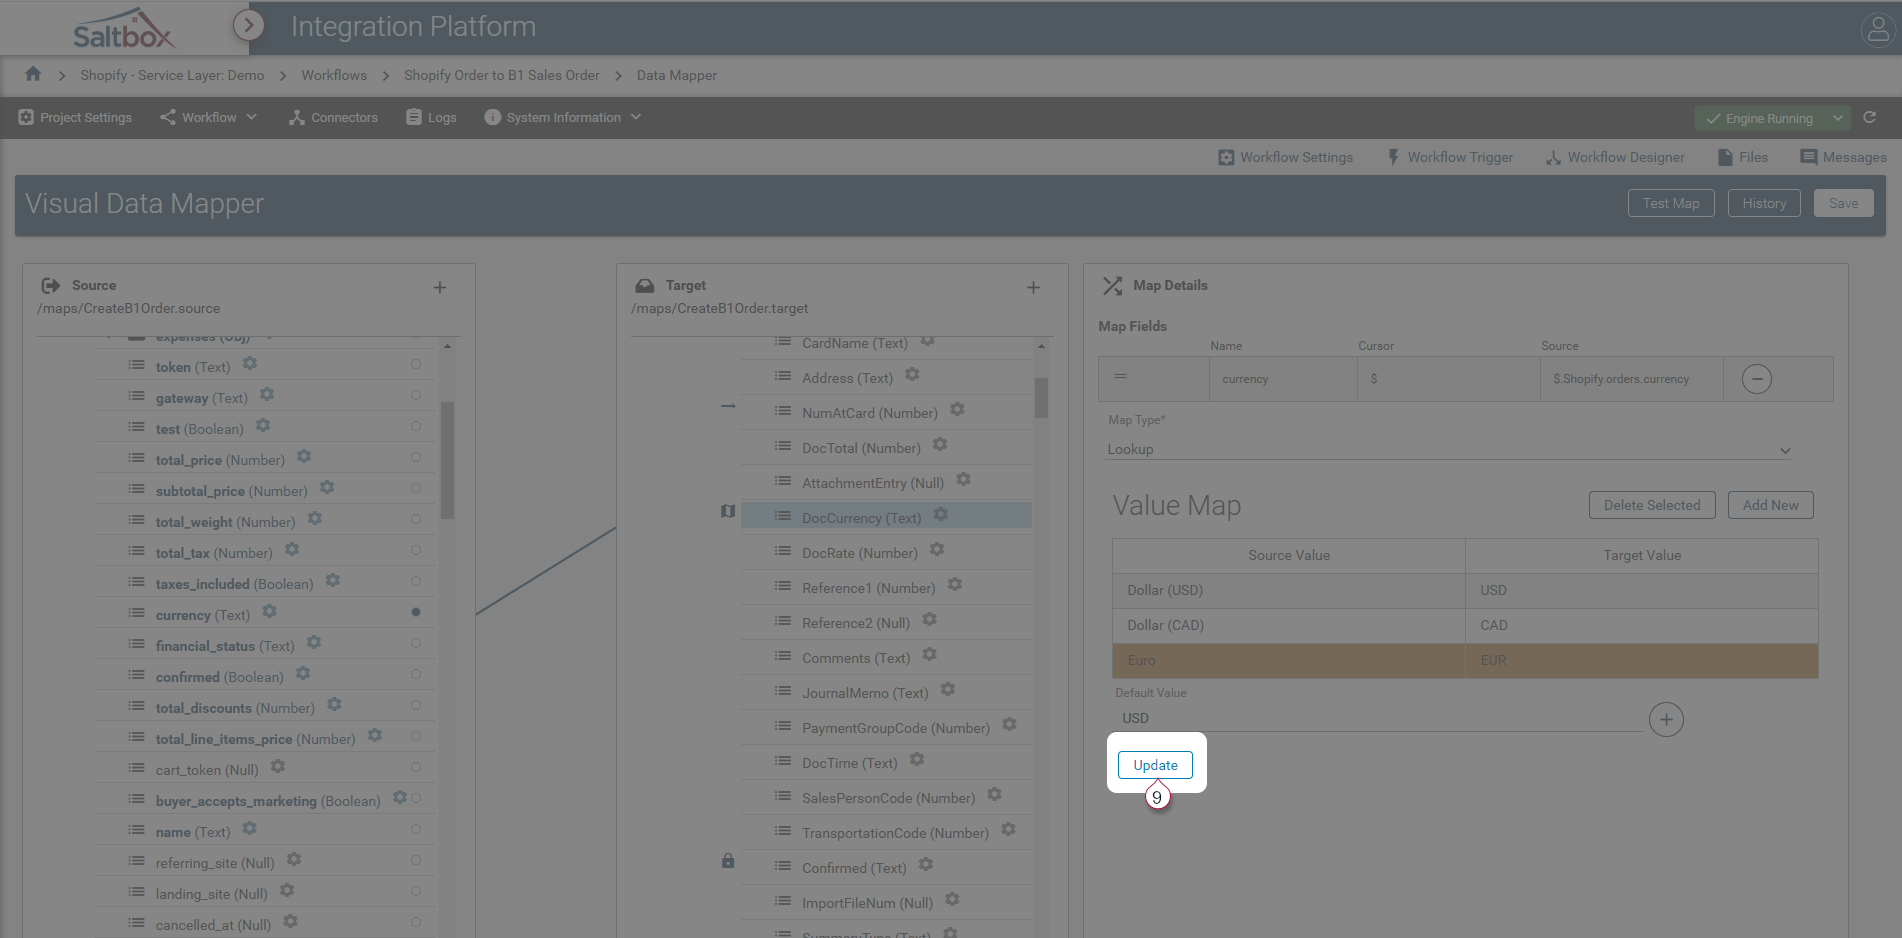
Step 4: Update the mapping
Apply settings changes using the update button. Note this will not save the changes, but will ensure they are applied, allowing further fields to be configured.
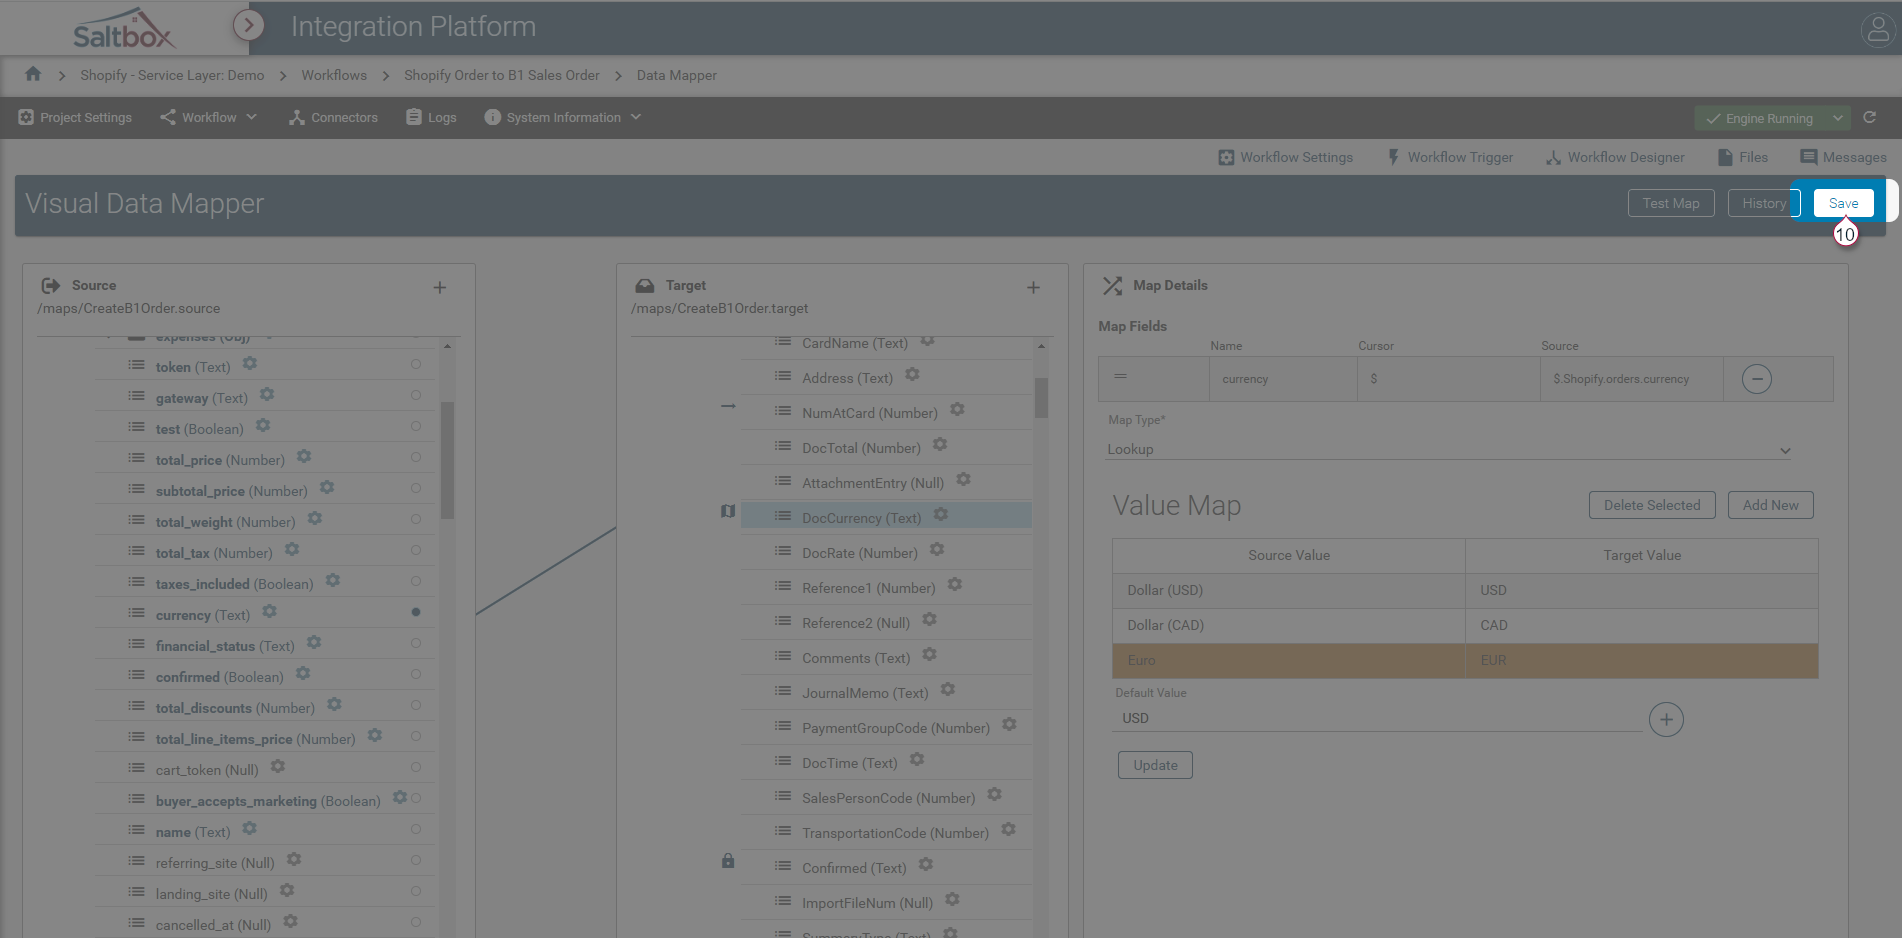
Step 5: Save changes
Once desired changes are updated, they are ready to be saved. This can be done as often as desired, and changes are tracked in file history. Changes may be rolled back using the Files history.