
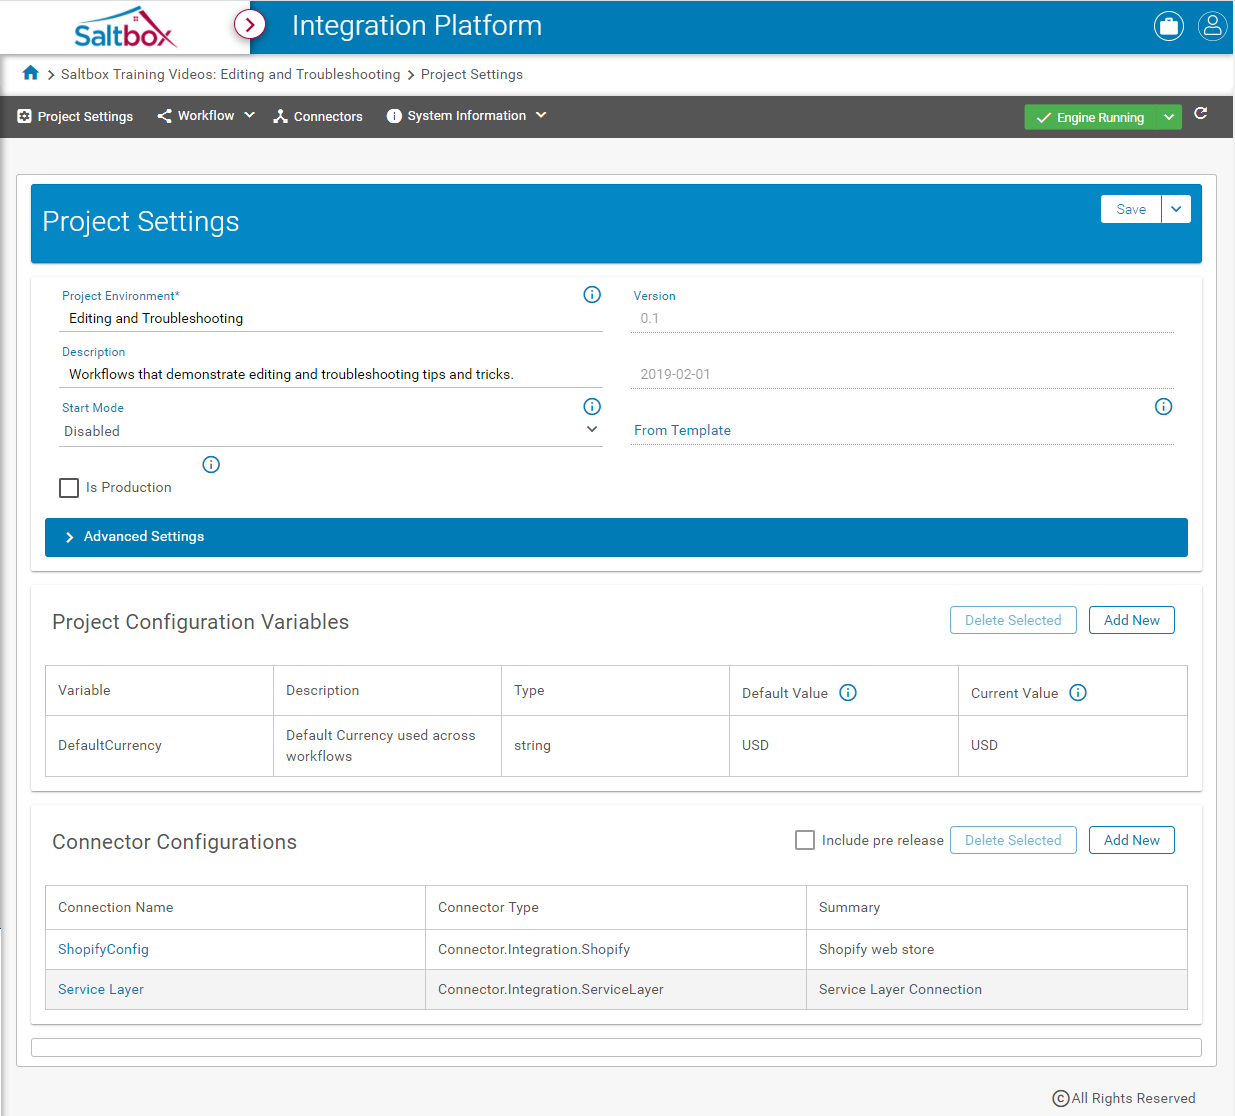
Project Settings Walkthrough
Summary
Project Settings are used to define a project and configure shared details that apply to multiple workflows.
The video above demonstrates how to configure Project Settings or refer to details below.
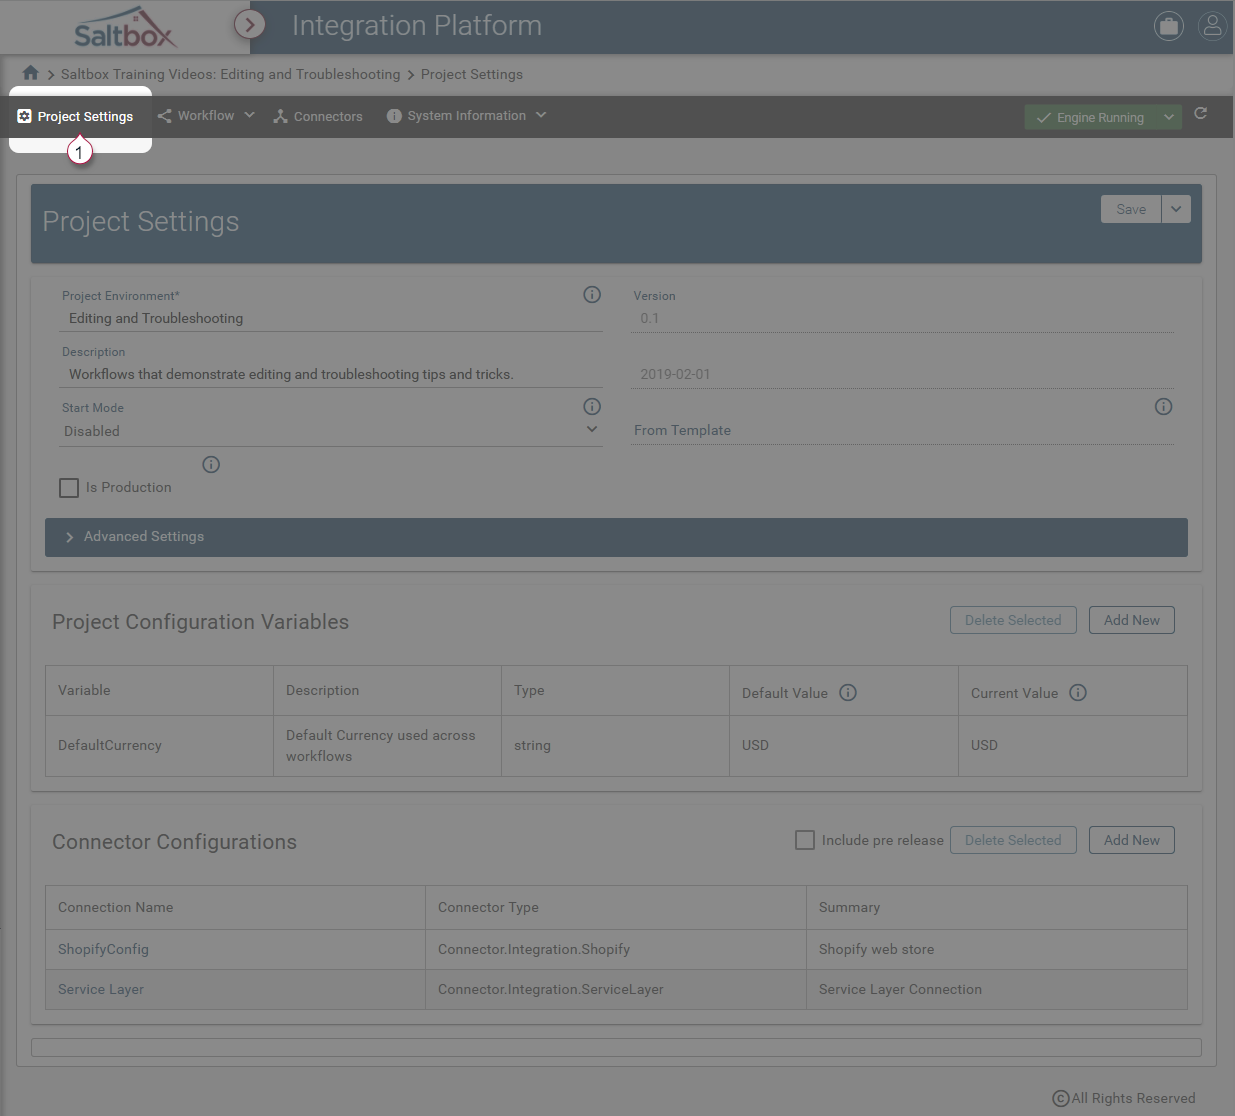
Step 1: Open Project Settings
Step 2: Update Environment Details
Environment details are used to identify the project in logs and throughout navigation.
2.1: Name and Description
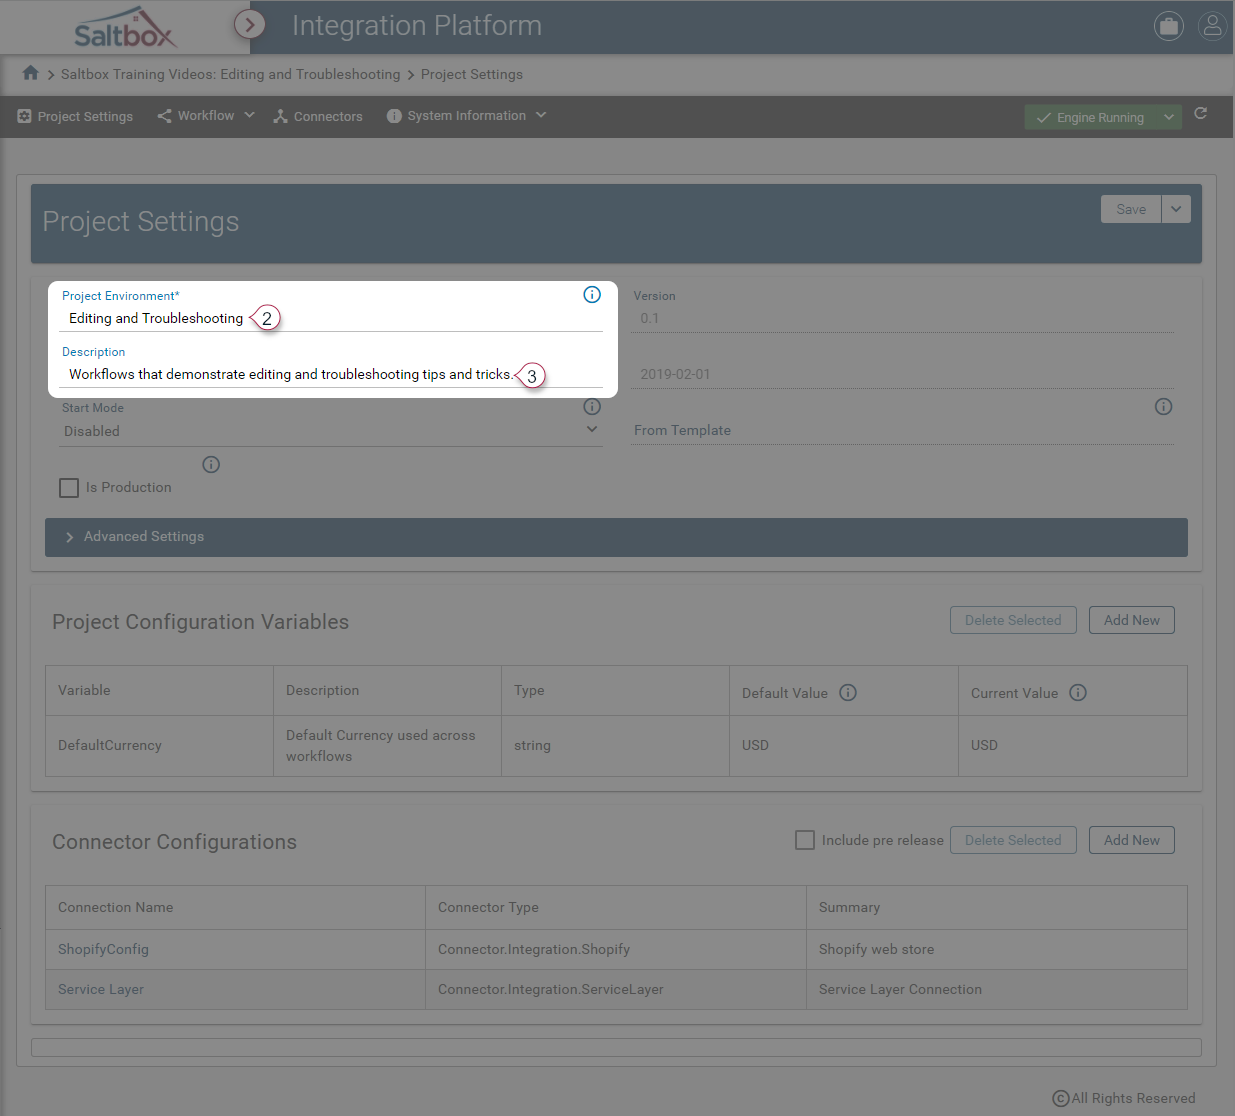
Name and Description are used throughout logs and to provide navigation. Choose a name that can be understood by the team who’ll make updates.
2.2: Startup/Production Mode
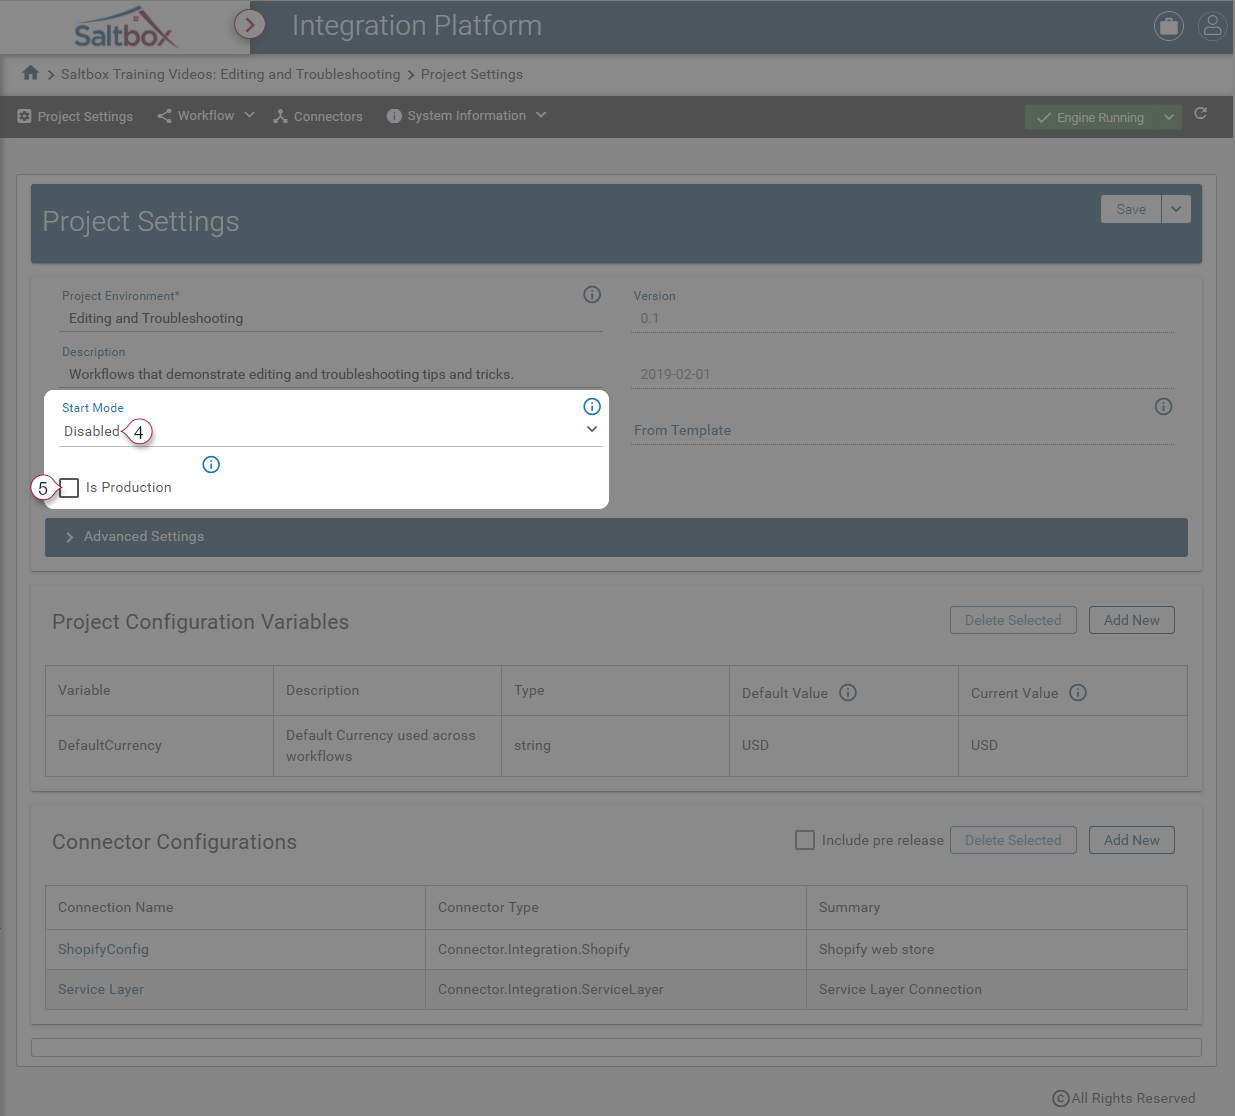
Startup Mode indicates whether the project’s engine should automatically restart when the server is restarted, for example, when performing system maintenance. This is usually Enabled during go-live roll-out.
Is Production enables scalability and performance optimizations which are unavailable to test environments.
2.3: Advanced Settings
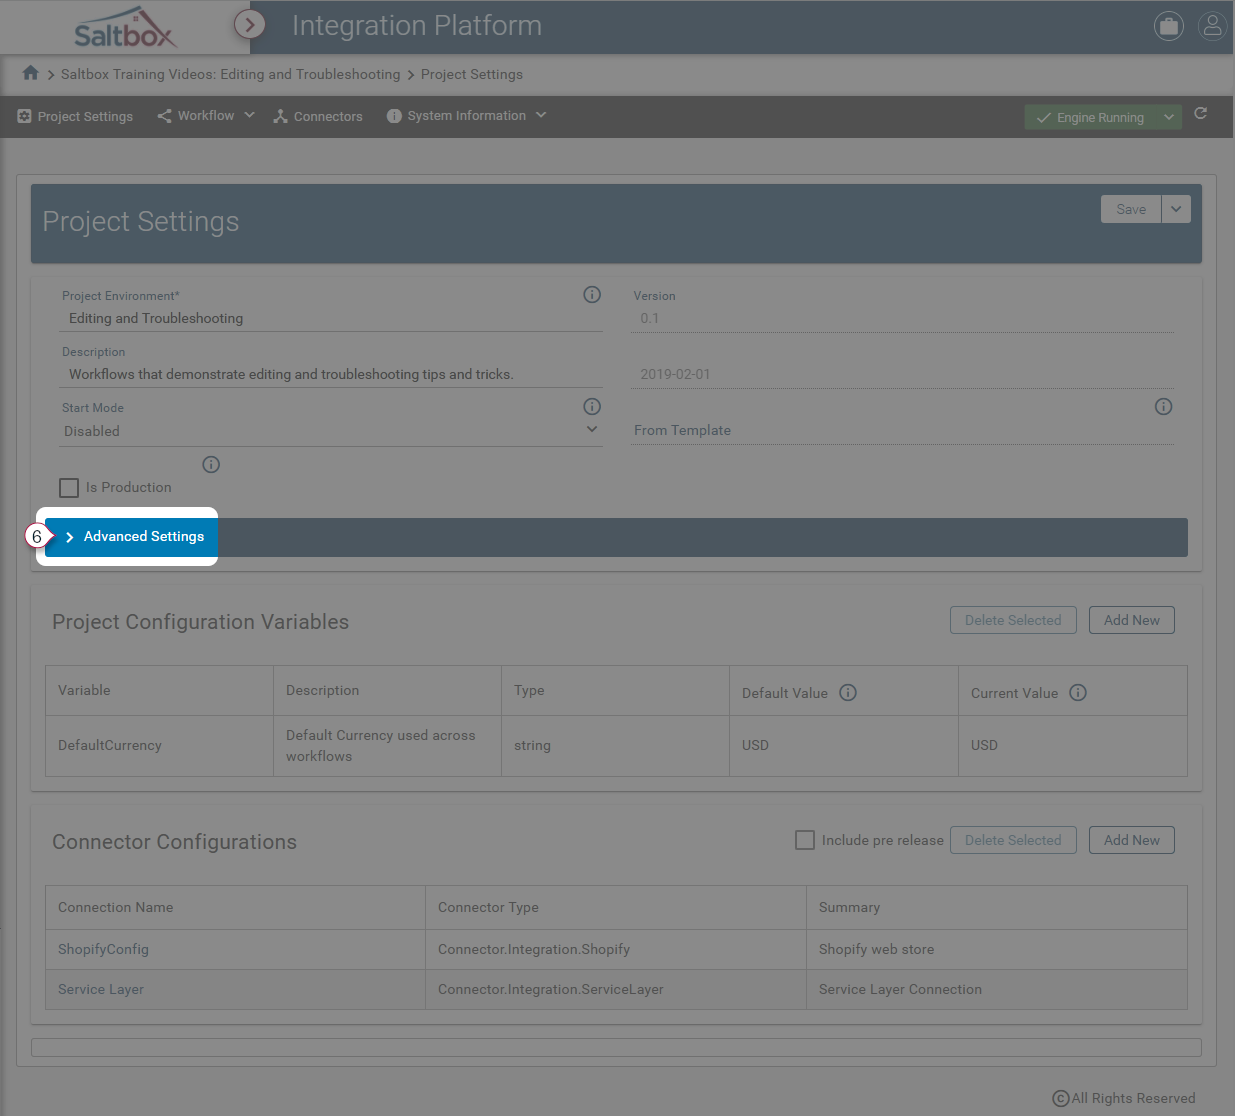
Advanced settings can be configured for a project including:
-
Max number of concurrent requests - This option allows the project environment to throttle (or scale up) the number of concurrent requests that can run for the project environment as a whole. That is, each workflow within that project shares in the number of requests. In an extreme example, if this value were set to 1, only one message would be processed at a time across all workflows.
By default, this is set to 20, which provides ample message throughput for many scenarios.
For on-premise application server engines, this number is limited by server hardware, endpoint requirements, and usage subscriptions.
For cloud engines, this number is limited by endpoint requirements and usage subscriptions.
-
Include pre-release (displayed on the bottom section near Connector Configurations) - This option allows the project environment to include pre-release versions of a Connector. Otherwise, only production-ready versions will be permitted in this project environment. A connector management role must be assigned to users before they can change connector settings.
Step 3: Configure Project Variables
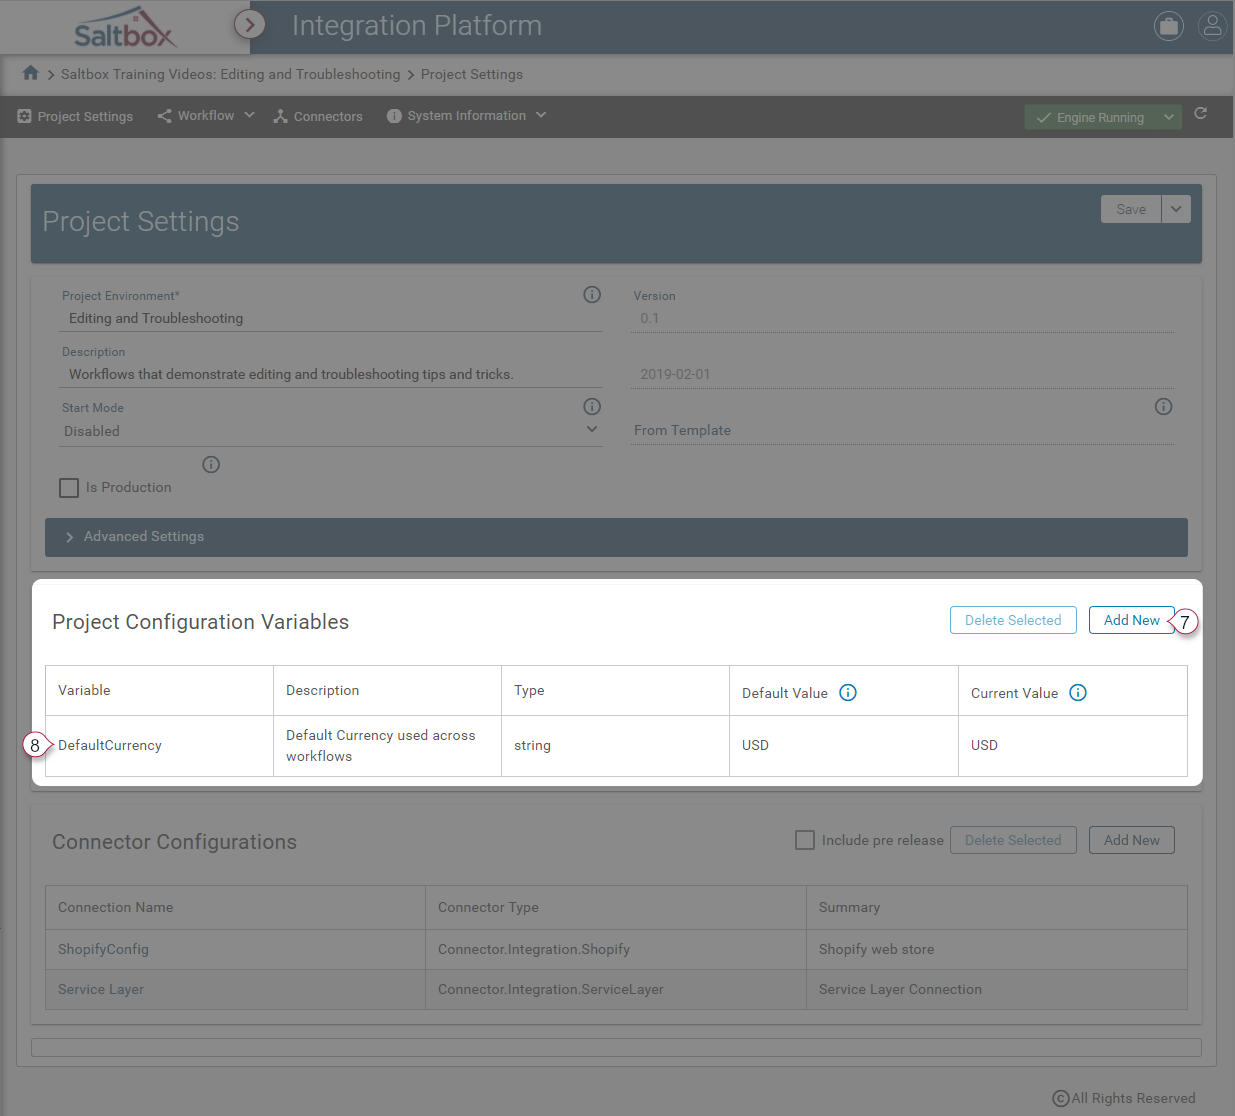
Project Variables are used to define settings or data that may be accessed across multiple workflows. For example, Default currency, web account ID’s and so on.
Add a new variable using the highlighted Add button (marker 6 above).
Then fill in details such as the name, data type, default, and current value (marker 7). Default Value is used when setting up a project from a template, however this setting is ignored once a Current Value is assigned.
Step 4: Add Connector Configurations
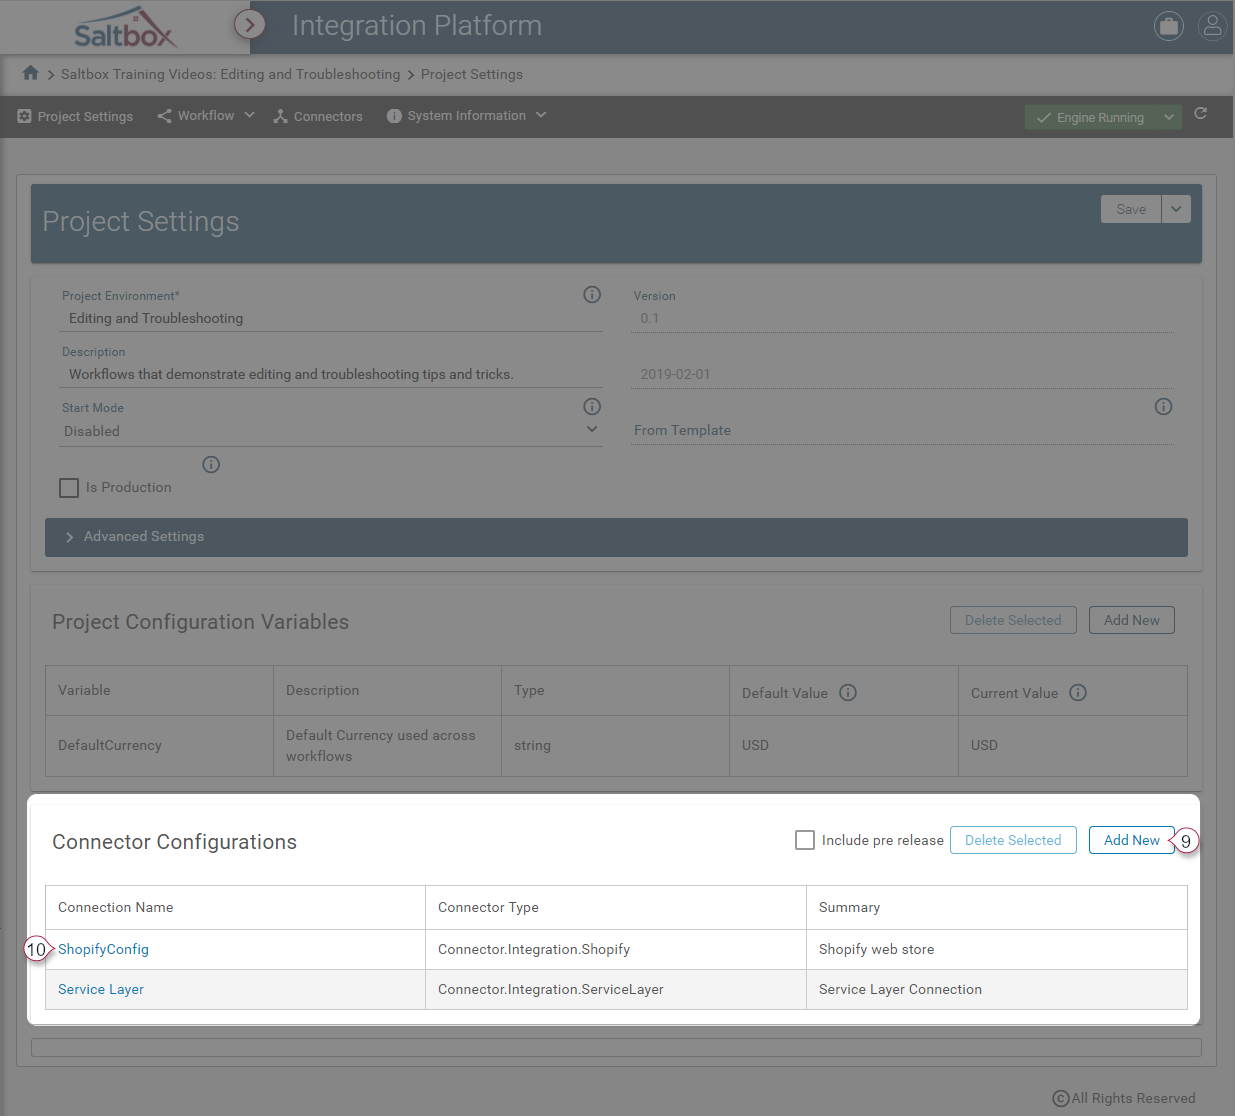
Connector Configurations allow connectors to securely access cloud systems. Add or Update configs to use them in workflows (markers 8, 9).
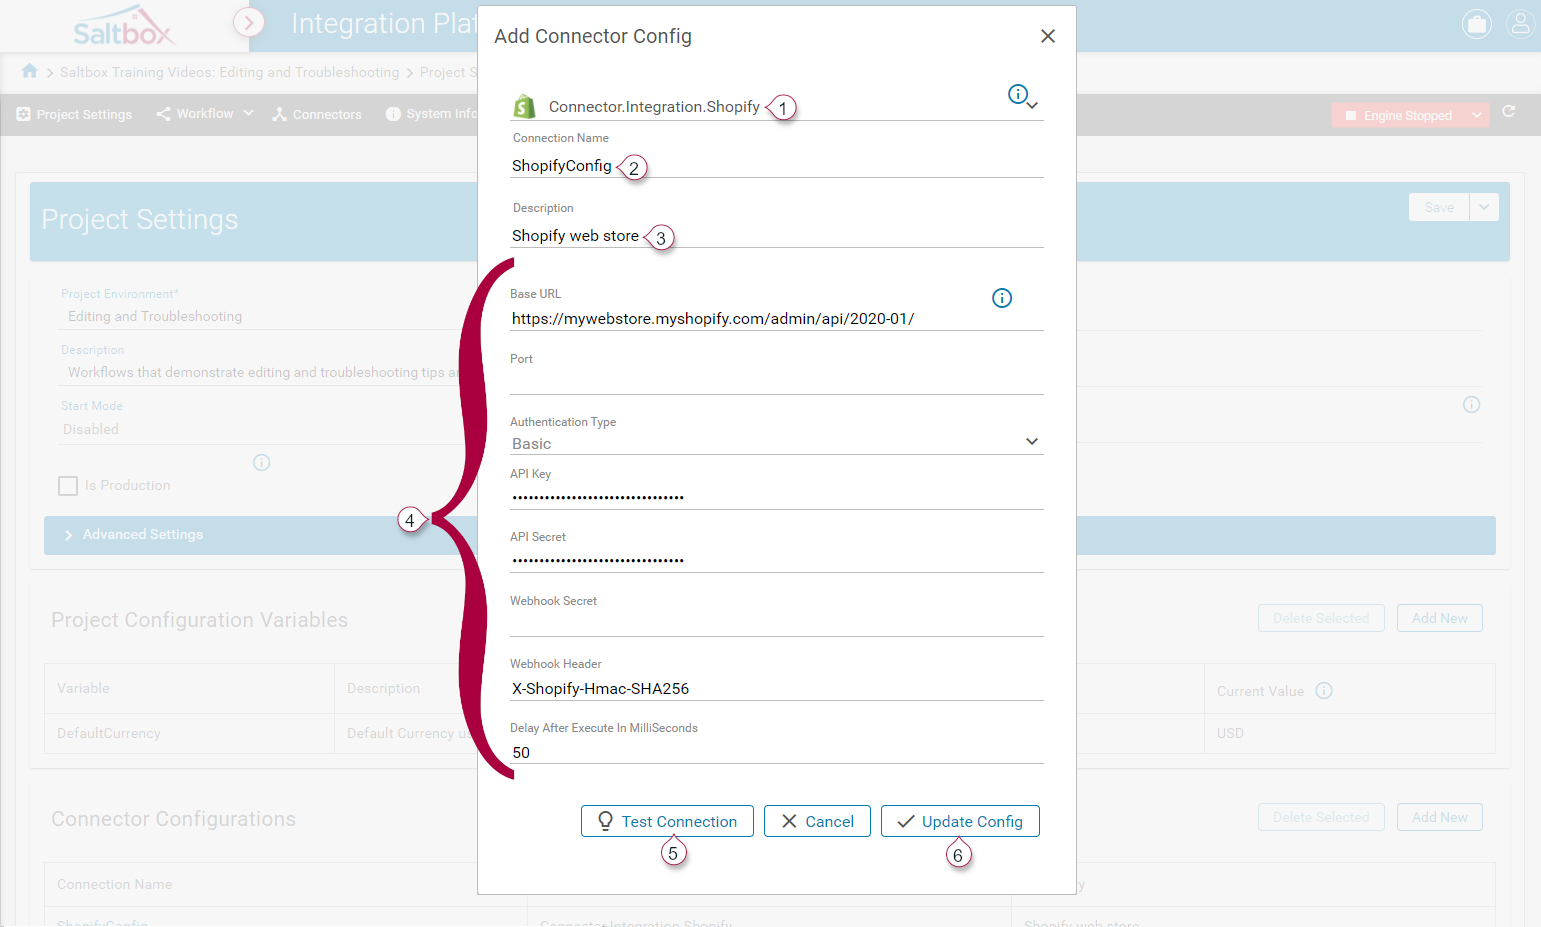
When editing a Connector Config:
-
Select the connector type. This will load connector-specific prompts.
-
Name and Description allow workflow designers to understand which system they are connecting to, if there is more than one connection.
-
Authentication Details (marker 4) vary from Connector to Connector. Fill in the details as prompted. Some settings are option, refer to the information bubbles to the right for examples.
-
Optionally test the connection (marker 5) if the Connector supports this.
-
Update Config settings to apply changes (marker 6) or use the Cancel button to discard. Note that this does not Save the changes until the next step.
Step 5: Save Changes
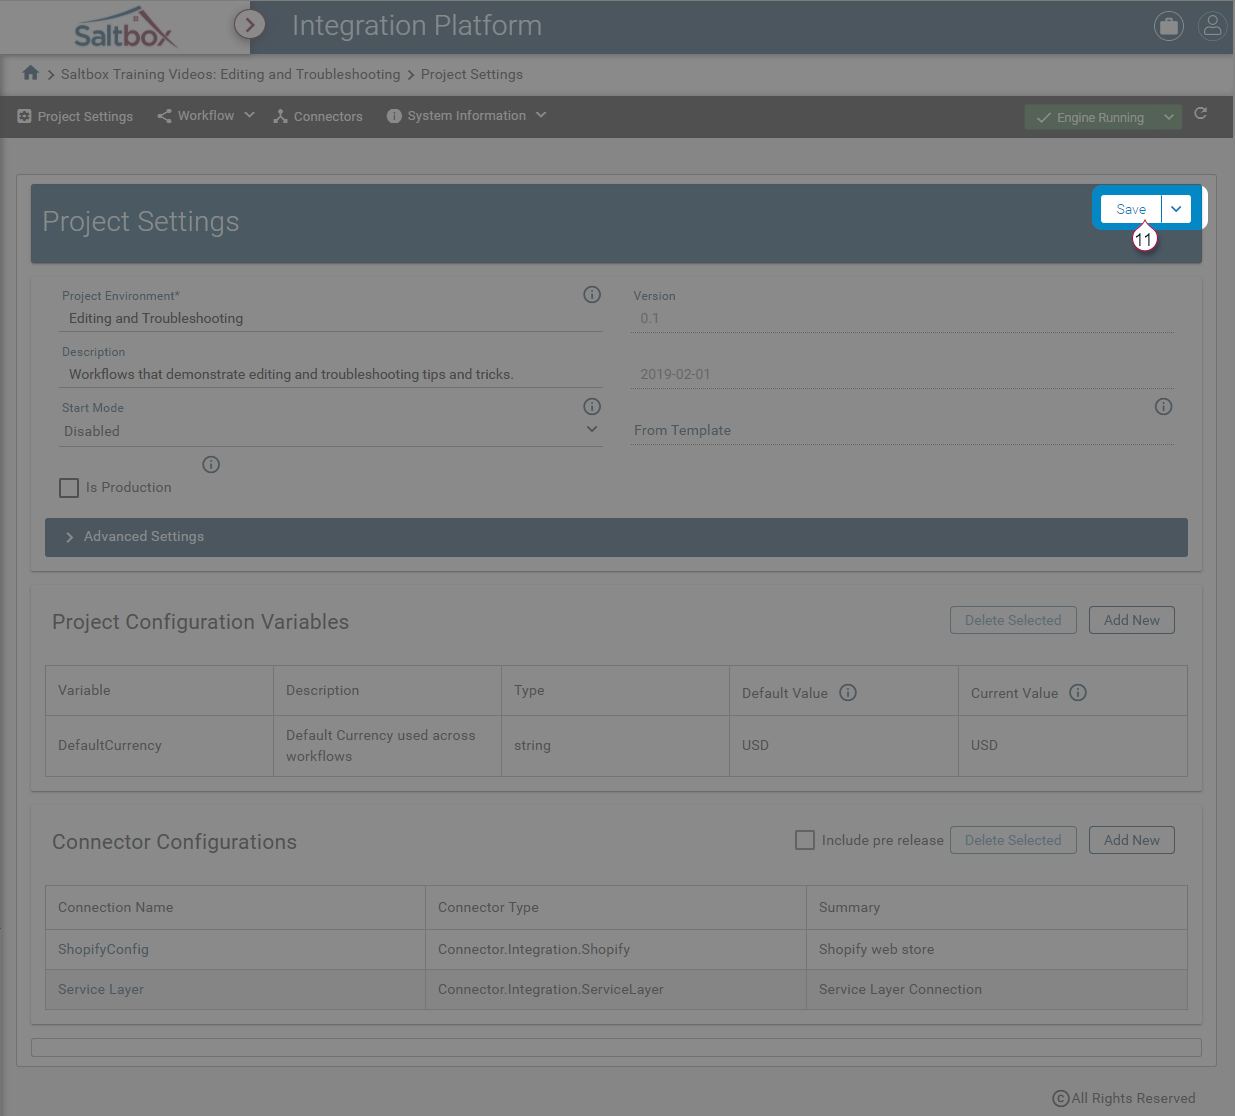
Save changes once updates are complete. Navigating to another page will discard any changes, including Connector Configs.