
If and If-Else Branch Setup within a Workflow
If and If-Else branches allow for flow control based on conditions. For example, whether certain data is populated, or based on workflow or project variables.
Both “If” branches and “If-Else” branches check for conditions, so the difference is in the flow when those conditions are met. “If” branches execute only if the conditions are met, otherwise, the branch is skipped. “If-Else” branches perform different actions depending on whether the conditions are met or not.
Step 1: Identify where the branch will be added
A new If/If-Else branch will either be contained within another branch, or will live within the main body of the workflow.
Step 2: Add the branch
-
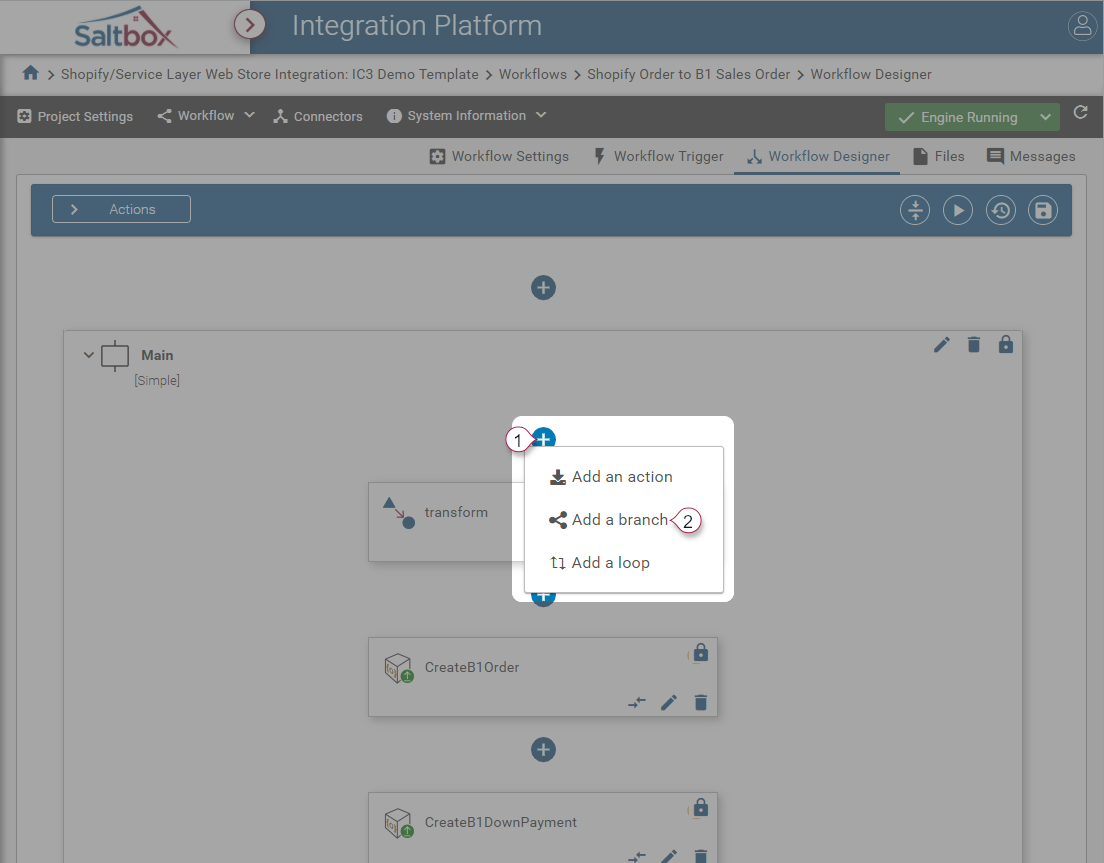
Use the + button at the desired location.
-
Select “Add a branch” if this is a nested branch. Otherwise the branch is added automatically and may be configured as outlined below.
Step 3: Configure the branch
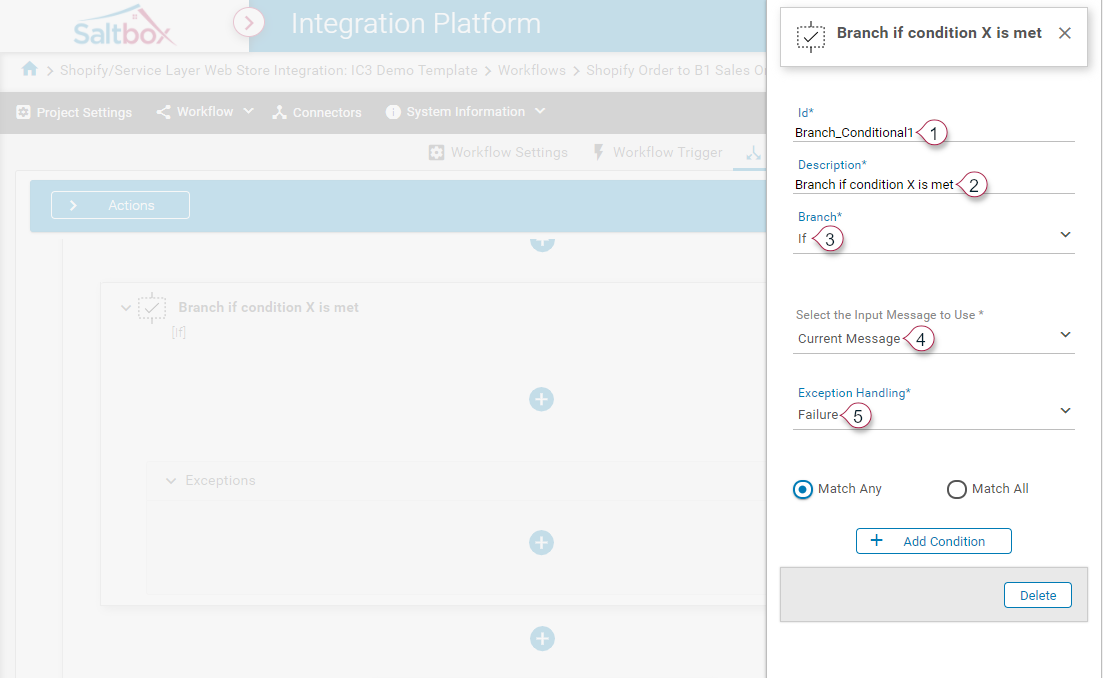
“If” and “If-Else” branches require the same basic setup: ID, Description, Branch Type, Conditions and Exception Handling.
-
Update the Branch ID to something meaningful to an admin. While not required, this will make it easier to trace through logs if troubleshooting is required.
-
Update the Branch Description. Again, this will aid in troubleshooting.
-
Select “If” or “IfElse” branch type.
-
Select “If” branch type when actions are only required under one set of conditions.
-
Select “IfElse” branch type when different actions are needed depending on the conditions.
-
-
Select the Input Message to Use. This Input Message may be inspected by a condition.
-
Select the desired Exception Handling.
-
No Exceptionmeans that all exceptions result in a failure. -
Retryindicates that the exception handling actions should only be performed when an automatic retry is configured. For example, Exception Handling actions may be used to to re-run an action on a delay to account for temporary data access issues. -
Failureindicates that the exception handling actions should only be performed when automatic retries have been exhausted. For example, a special email alert when all retries have failed.
-
-
Add one or more conditions, which will determine which path to execute.
In the example below, Condition 1 has been set to inspect a Workflow Variable flag to see if that option is enabled.
Alternatively, use XPath to inspect data in the Input Message.

-
Navigate back to the main workflow.
Step 4: Add at least one action
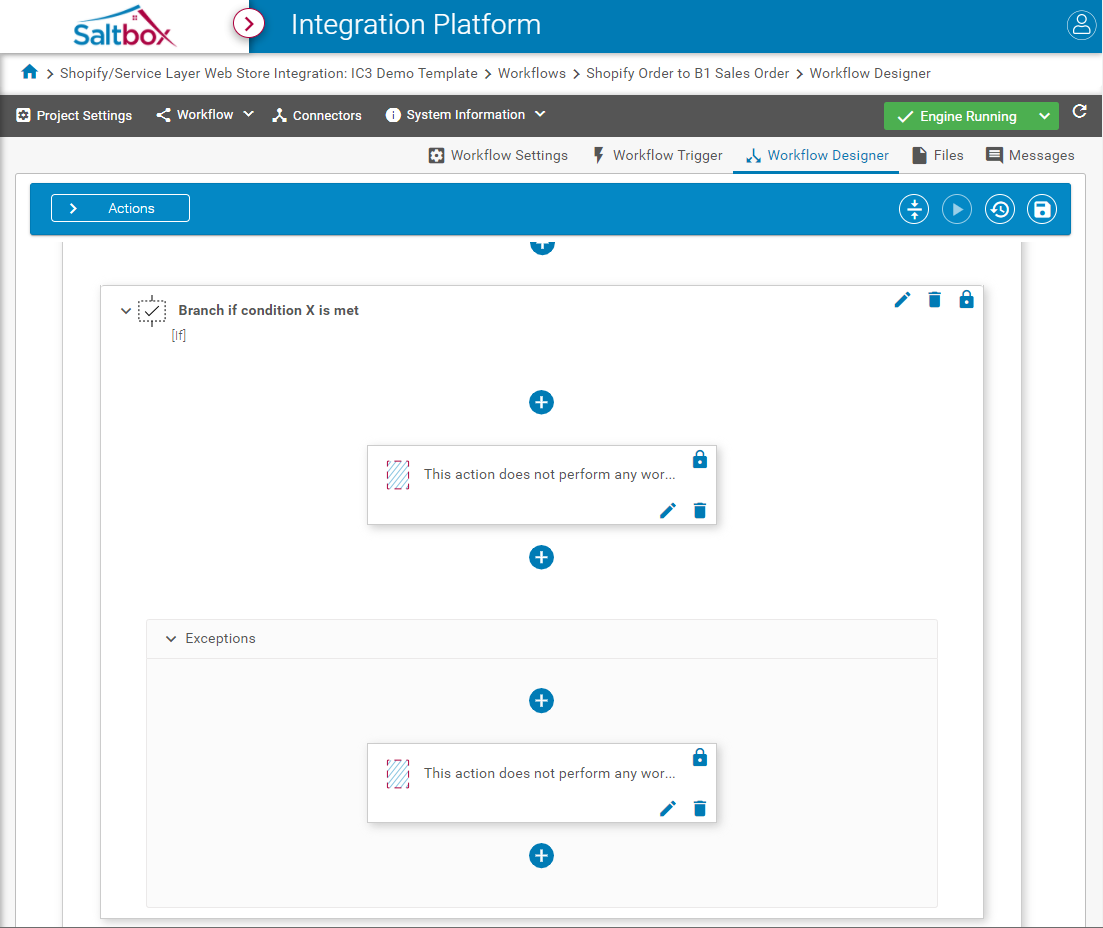
Branches are used to group together actions within a workflow, so at least one action is required.
Placeholder actions do not perform any business logic, so are a good option when scaffolding out a new workflow. Or, add the desired actions to the branch.
“If” branches only have a single execution path, so only require one action before it can be saved.
“If-Else” branches have two execution paths, so each path requires its own action before it can be saved.
If Exceptions were enabled, at least one action must be added to the exception path as well.
Step 5: Save changes
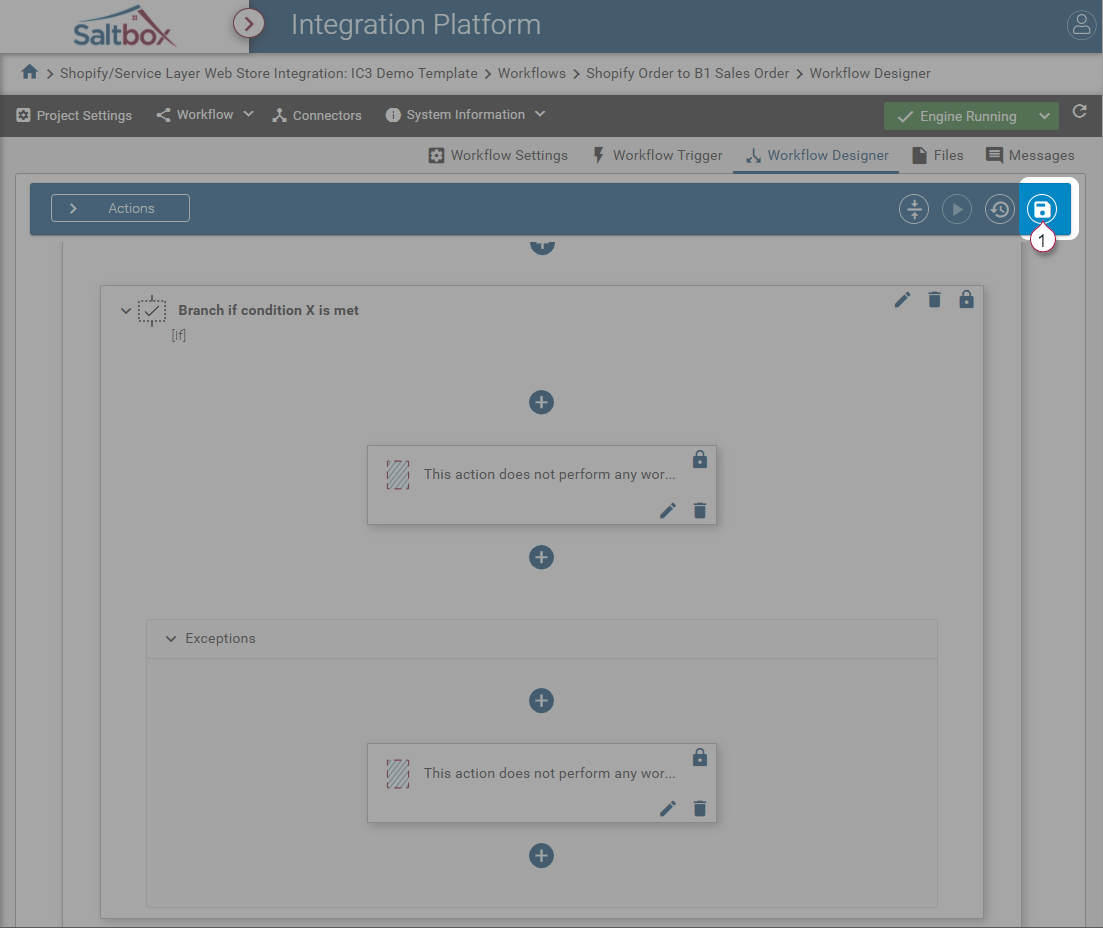
Use the workflow save button to save any branch configuration, and add comments describing what was changed.
This will apply changes immediately and allow the workflow to use the latest version of the workflow, including the new branch.