ForEach Branch Setup within a Workflow
ForEach Iterator branches provide flow control based on collections of data, where order of execution matters.
For example, if a batch of order IDs need to be processed in sequential order, ForEach is a good fit. However, if that same batch of IDs does not need to be sequentially processed, then a Workflow Trigger may instead be used to split those same IDs into many messages, allowing for each of those IDs to be processed concurrently.
Basically:
- If order of execution matters, use a ForEach Iterator branch.
- If data may be processed in any order, use a Workflow Trigger to split the data into individual messages.
- If a failure in one iteration should stop all subsequent iterations, use a ForEach Iterator branch.
- If a failure in one iteration should not impact other iterations, use a Workflow Trigger to split the data into individual messages.
Step 1: Identify where the branch will be added
A new ForEach branch will either be contained within another branch, or will live within the main body of the workflow.
Note that a ForEach branch cannot be contained within another ForEach branch. If this scenario is required, review the workflow design and speak with your implementation consultant for suggestions. Other options within Visual Data Mapper may be used instead, or Workflow Triggers may be used to split data into more specific pieces for scalable processing.
Step 2: Add the for-each loop branch
-
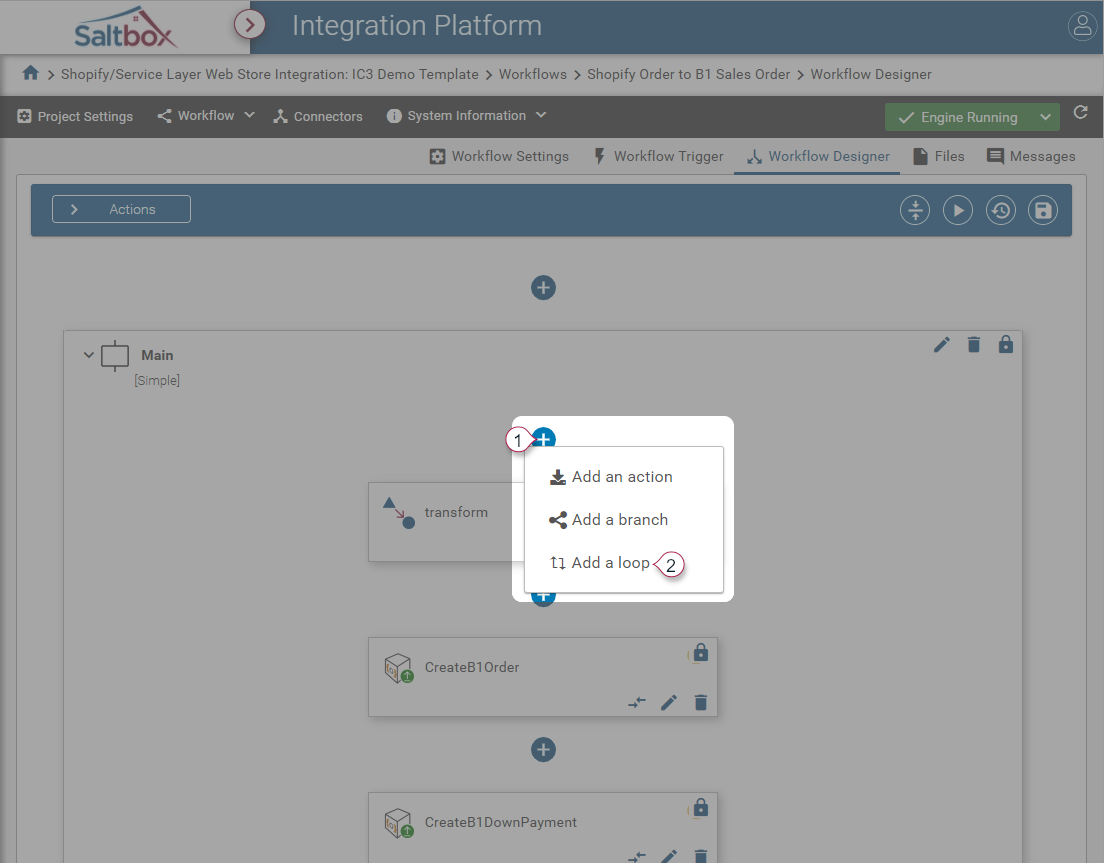
Use the + button at the desired location.
-
Select “Add a Loop”. This will add a “ForEach” loop branch.
Step 3: Configure the branch
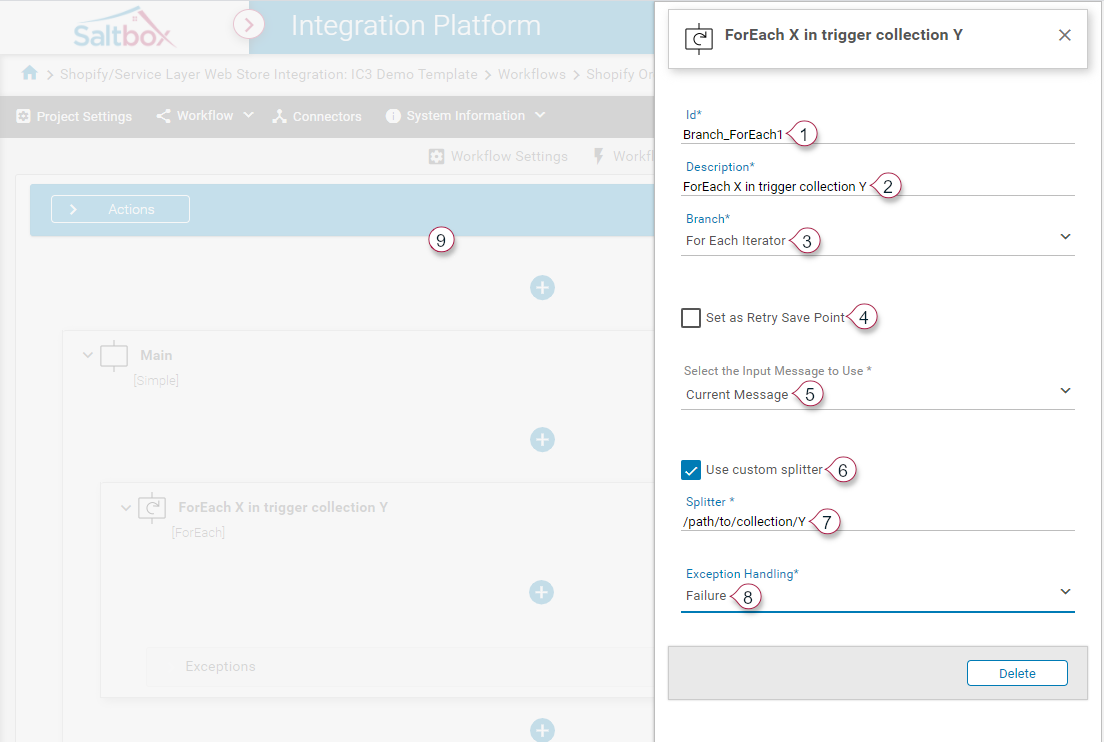
ForEach Iterator branches require the following details: ID, Description, Branch Type, Input Message (containing the data to iterate over), Splitter and Exception Handling.
-
Update the Branch ID (marker 1 above) to something meaningful to an admin. While not required, this will make it easier to trace through logs if troubleshooting is required.
-
Update the Branch Description (marker 2 above). Again, this will aid in troubleshooting.
-
Select “For Each Iterator” branch type (marker 3 above).
-
Enable “Set as Retry Save Point” (marker 4 above) if the beginning of the ForEach Iterator will be used as a save point (i.e. start at the beginning of the ForEach Iterator upon retry).
-
Select the Input Message to Use (marker 5 above). This Input Message must contain a collection of data to loop over. This will be defined using a splitter.
-
Enable “Use custom splitter” (marker 6 above) to provide a Splitter XPath (marker 7 above), or select an available splitter from the drop-down. If splitters are not provided by the workflow’s assigned connectors, a custom splitter XPath must be defined instead. This is the XPath within the selected Input Message that points to the collection of data to loop over. For example, an order’s lines, or a query’s result set.
-
Select the desired Exception Handling (marker 8 above)
-
No Exceptionmeans that all exceptions result in a failure. -
Retryindicates that the exception handling actions should only be performed when an automatic retry is configured. For example, Exception Handling actions may be used to to re-run an action on a delay to account for temporary data access issues. -
Failureindicates that the exception handling actions should only be performed when automatic retries have been exhausted. For example, a special email alert when all retries have failed.
-
-
Navigate back to the main workflow (marker 9 above).
Step 4: Add at least one action
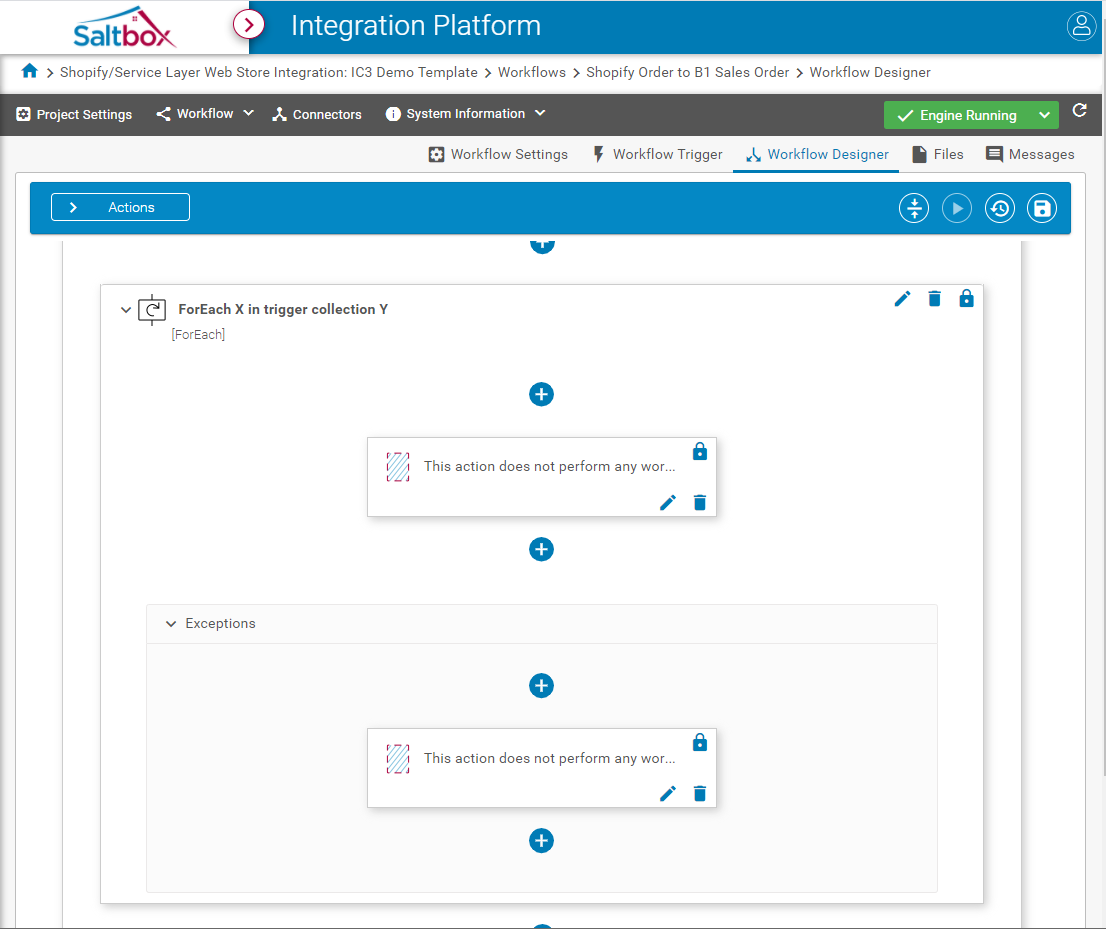
Branches are used to group together actions within a workflow, so at least one action is required.
Placeholder actions do not perform any business logic, so are a good option when scaffolding out a new workflow. Or, add the desired actions to the branch.
If Exceptions were enabled, at least one action must be added to the exception path as well.
Step 5: Save changes
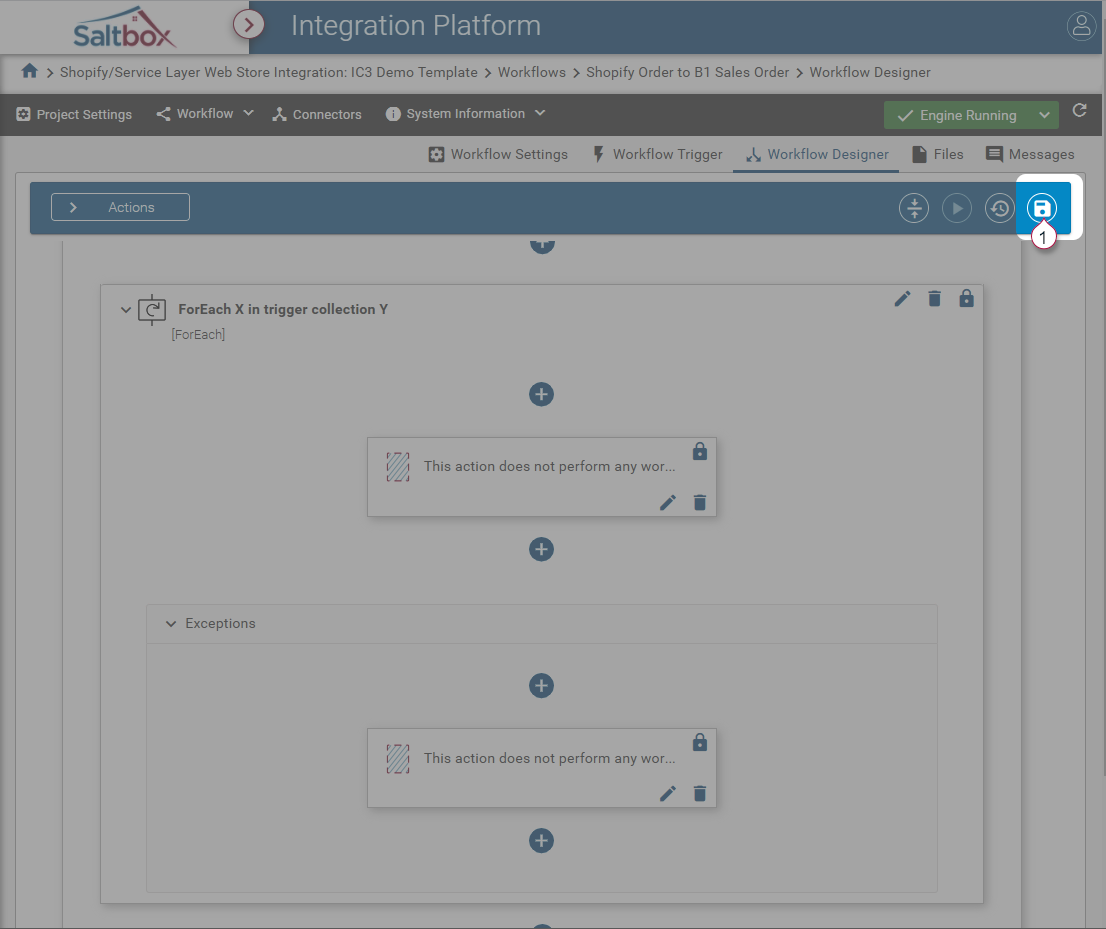
Use the workflow save button to save any branch configuration, and add comments describing what was changed.
This will apply changes immediately and allow the workflow to use the latest version of the workflow, including the new branch.


