
Format Settings Reference for WooCommerce Connector

In general, Format Settings are used by workflow triggers to define how to handle and pre-process data that is fetched from a system. This setting is responsible for converting data from one format (such as csv or json) into Saltbox Message format (XML) so it can be processed by the workflow. Some Connectors apply a default Data Source Format automatically, while others require configuration. This depends on the Connector, and is outlined where appropriate below.
WooCommerce Connector triggers utilize the following message formats:
| Message Format | Description | Version |
|---|---|---|
WooCommerce |
Handle WooCommerce’s message format. | 1.0+ |
WooCommerce Converter - Split options |
Handle WooCommerce’s message format. Use advanced options to split data into multiple messages. | 1.1+ |
Message Formats
WooCommerce
| Message Format | Description | Version |
|---|---|---|
WooCommerce |
Handle WooCommerce’s message format. | 1.0+ |
To split data into multiple messages, you must first know the XPath to the list of data that will be split apart. This can be found by inspecting the trigger’s source data. A walkthrough of this process is found below.
For example, using the WooCommerce Order Message Source, the workflow may want to process individual lines as separate messages instead of one single order. To split order lines, set XPath to contained messages to: /WooCommerce/items/line_items.
A walkthrough is found at the following link: How to find an XPath in Trigger source data
WooCommerce Converter - Split options
| Message Format | Description | Version |
|---|---|---|
WooCommerce Converter - Split options |
Handle WooCommerce’s message format. Use advanced options to split data into multiple messages. | 1.1+ |
This is the default option for most WooCommerce trigger sources.
If you need to split data, for example if you need to split an order’s lines into separate messages, use WooCommerce Converter - Split options. A walkthrough of splitting data into multiple messages is found at the following link: How to find an XPath in Trigger source data
How to find a Data Path in Trigger source data
When a single source message contains multiple data points that need to be processed (for example, an order may be split into multiple lines, or a customer may be split into multiple contacts), they may be split using advanced Format Settings. The field Data Field Path used to Sub-Divide Transactions is used to split apart triggered data into separate messages. Use the process outlined below to generate the trigger data source and inspect it, so that the correct path may be assigned.
The operation below is best performed on a test system that has the same data structure as the production system. Otherwise, exercise caution when running the workflow to avoid duplicate data.
-
Open an existing workflow, or set up a new workflow as outlined in our 2-minute video tutorial: Workflow Trigger Setup.
-
Run the trigger to generate a sample message. This may be done by running the workflow as-is, or you may add an action such as “End the Workflow” to fire the trigger but end the workflow without performing any work.
-
In workflow designer, add the Saltbox Core Connector action
End the Workflowto the beginning of the workflow. -
Save the workflow.
-
Restart the engine.
-
Run the workflow to generate a trigger message. Note that you may need to modify the trigger filters or set the option “ignore last run” to generate the sample message.
-
-
Inspect the raw message data on the messages page and save it.
-
Go to the workflow’s Messages page.
-
Look for the most recent Raw type message. The latest data is loaded at the top.
-
Use the actions button (…) to “View Raw Message Details”.
-
On the raw message details window, set the option “Details to Display” to “Raw Message Data”.
-
Press the “Save to Samples” button on the upper right to save a copy of the message to the workflow’s files.
-
-
Configure the trigger’s
Data Field Path used to Sub-Divide Transactionsfield.-
Press the + button next to the field
Data Field Path used to Sub-Divide Transactions.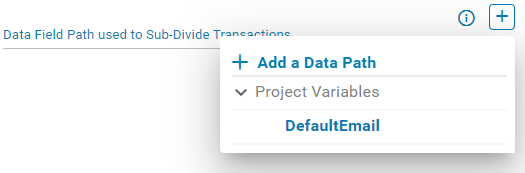
-
Select the option
+ a Add Data Path -
Select the sample file that was previously saved. This will load it into a tree viewer.
-
Select the desired data path. The selected path will be used to split apart raw data into multiple messages.
-
Press “Apply” to add the data path.
-
Press “Save” to save updates to the workflow trigger.
-